 Save
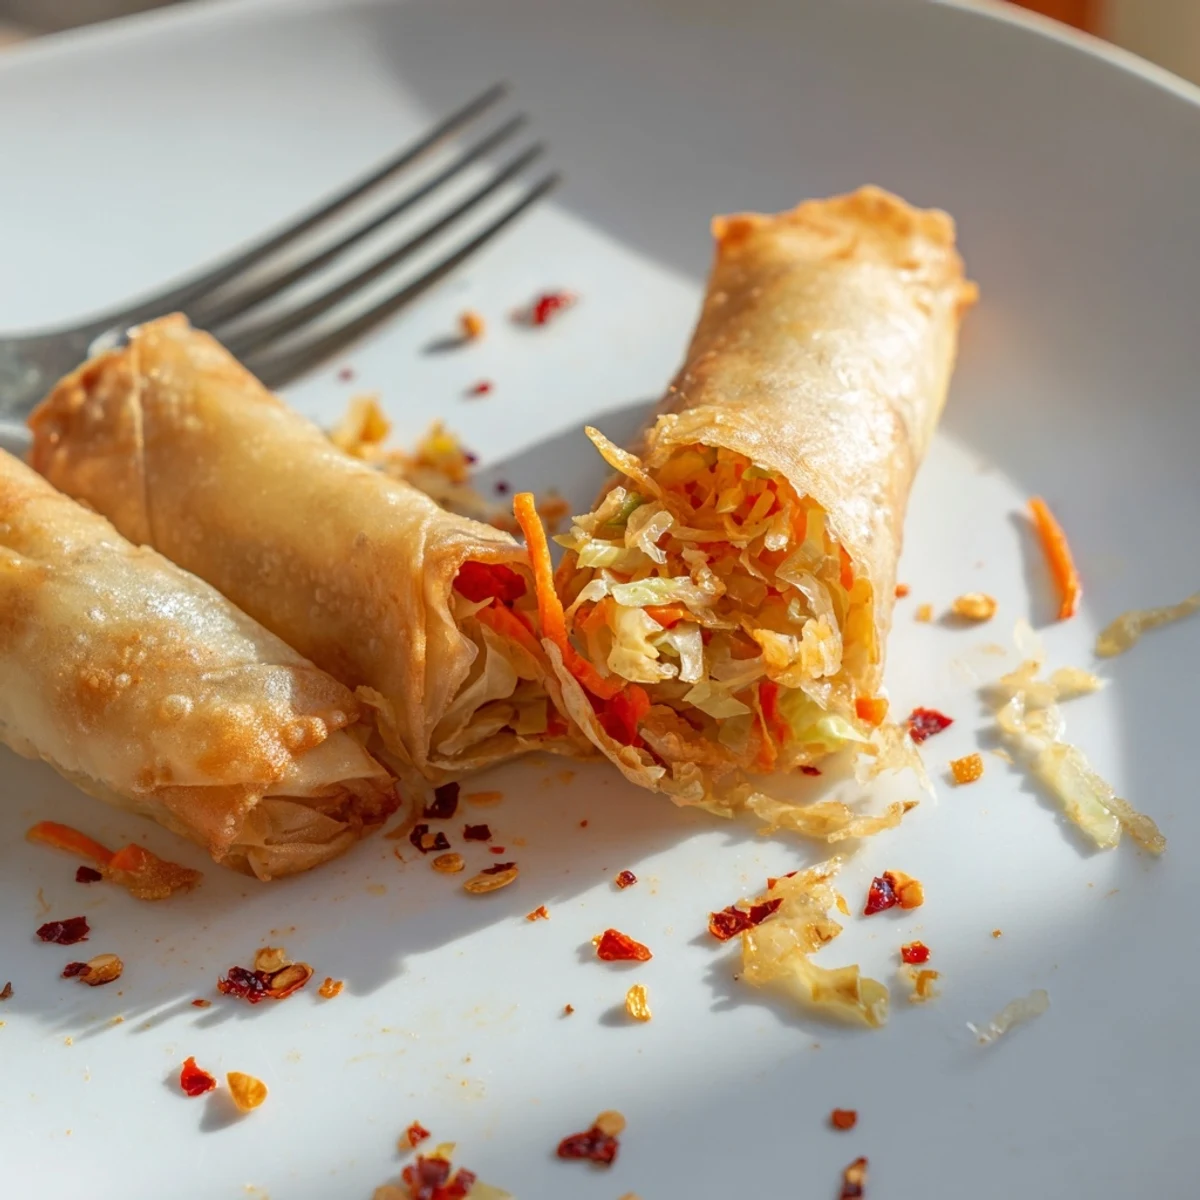
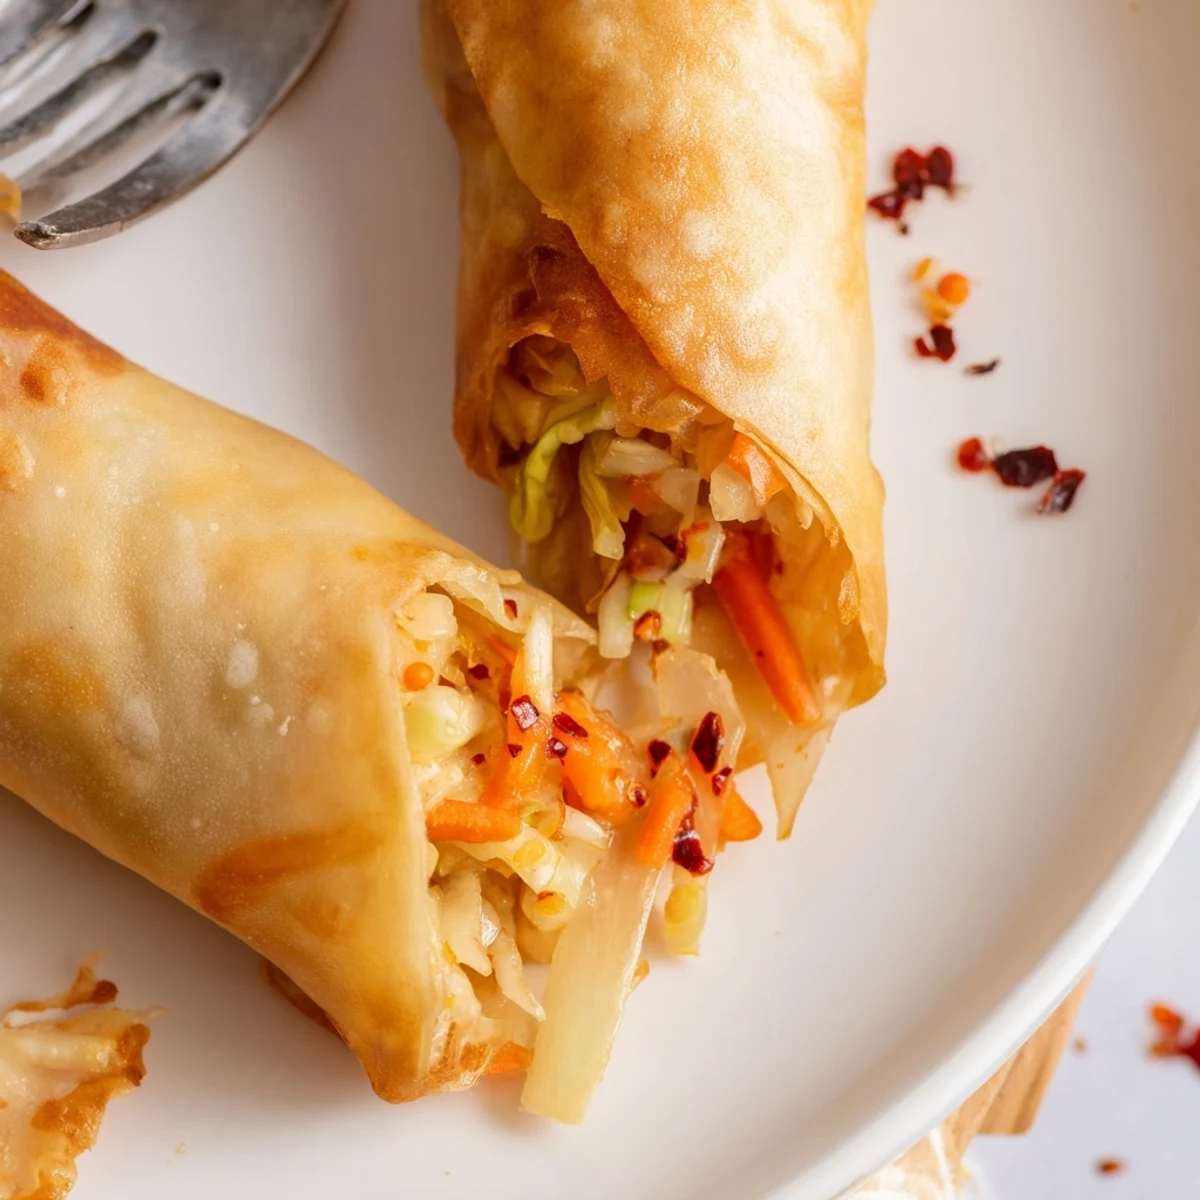
Save These crispy golden rolls deliver all the crunch of traditional versions while using significantly less oil. The vegetable filling combines shredded cabbage, julienned carrots, bean sprouts, and aromatic aromatics for maximum flavor.
Your air fryer creates that irresistible crunch while keeping preparation simple. Ready in under 45 minutes, these make ideal appetizers or light snacks. The tangy dipping sauce perfectly complements the savory filling, creating that restaurant-quality experience right at home.
Customize with protein additions like chicken or tofu, and adjust the vegetables based on preference. The rolling technique takes a little practice but becomes quick and easy once you master the fold.
My tiny apartment kitchen smelled incredible when I first tried making spring rolls at home. The sizzle of garlic and ginger hitting hot sesame oil filled every corner. I honestly did not expect air frying to give them that satisfying crunch we all crave.
Last summer my sister came over and we made these together while catching up. She was skeptical about the air fryer but ended up eating three straight from the basket. Now she texts me whenever she craving them.
Ingredients
- 1 cup shredded cabbage: Creates that authentic crunch inside every bite
- 1 medium carrot, julienned: Adds sweetness and beautiful color contrast
- ½ cup bean sprouts: Essential for that fresh snappy texture
- 4 green onions, thinly sliced: Brings a mild onion flavor throughout
- 2 cloves garlic, minced: Non-negotiable for authentic flavor
- 1 teaspoon fresh ginger, grated: Fresh makes such a difference here
- 2 tablespoons soy sauce: Our main seasoning and salt source
- 1 tablespoon sesame oil: Toasted sesame oil adds depth
- ½ teaspoon ground black pepper: Just enough subtle heat
- 12 spring roll wrappers: Thaw completely or they will tear
- 1 tablespoon cornstarch mixed with 2 tablespoons water: Makes a perfect sealing paste
- Olive or vegetable oil spray: Helps achieve that golden exterior
- 3 tablespoons soy sauce: Base for our quick dipping sauce
- 1 tablespoon rice vinegar: Cuts through the rich wrapper
- 1 teaspoon sugar: Balances the salty soy sauce perfectly
- ½ teaspoon chili flakes: Adjust based on your heat preference
Instructions
- Cook the filling:
- Heat sesame oil in a large skillet over medium heat. Add garlic and ginger, cooking for 1 minute until you can smell them. Toss in cabbage, carrot, and green onions. Sauté 3 to 4 minutes until softened.
- Season and finish:
- Stir in bean sprouts, soy sauce, and pepper. Cook another 2 minutes. Remove from heat and let cool completely. Hot filling will tear delicate wrappers.
- Roll like a pro:
- Place wrapper in a diamond shape. Spoon 2 tablespoons filling near bottom corner. Fold corner over filling, roll halfway, then fold in sides. Continue rolling tightly. Brush final edge with cornstarch slurry to seal.
- Heat things up:
- Preheat your air fryer to 390°F (200°C). Make sure the basket is clean.
- Get ready to crisp:
- Lightly spray all sides of spring rolls with oil. Arrange in a single layer. Work in batches if needed rather than overcrowding.
- Air fry to golden:
- Cook 7 to 8 minutes. Flip carefully. Air fry 5 to 7 more minutes until deeply golden and crisp all over.
- Whisk the sauce:
- Combine soy sauce, rice vinegar, sugar, and chili flakes in a small bowl. Whisk until sugar dissolves completely.
- Share immediately:
- Serve spring rolls hot while still crispy. Pass the dipping sauce alongside. Watch them disappear fast.
 Save
Save These became my go-to for hosting because people get so excited rolling their own. Friends gather around the counter with wrappers everywhere, laughing at our uneven attempts. Somehow the imperfect ones taste even better.
Making Them Your Own
I have found that adding cooked shredded chicken or tofu makes them more filling. Shredded mushrooms add a meaty umami flavor vegetarians love. Small handfuls of vermicelli noodles soak up extra seasoning beautifully.
Sauce Swaps
Sweet chili sauce from a bottle works in a pinch. My neighbor swears by mixing plum sauce with hot mustard. Sometimes I just use extra soy sauce with sliced jalapeños for simplicity.
Storage and Reheating
Uncooked spring rolls freeze incredibly well. Place them on a baking sheet until firm, then transfer to a freezer bag. Air fry frozen rolls at 390°F for about 12 minutes, adding a few extra minutes if needed. They taste just as good as fresh.
- Never refrigerate uncooked spring rolls
- Leftovers reheat best at 350°F for 3 to 4 minutes
- Store cooked rolls loosely covered to maintain crispness
 Save
Save There is something deeply satisfying about pulling out a basket of golden spring rolls you made yourself. Even better when shared with people you love.
Recipe FAQs
- → How do I keep spring rolls from getting soggy?
-
Ensure your vegetable filling cools completely before wrapping. Excess moisture creates sogginess. Also, avoid overcrowding the air fryer basket—arrange rolls in a single layer with space between them for proper air circulation.
- → Can I bake these instead of using an air fryer?
-
Yes. Preheat your oven to 400°F and place rolls on a parchment-lined baking sheet. Brush with oil and bake for 15–20 minutes, flipping halfway through, until golden and crisp.
- → How long do these stay crispy after cooking?
-
For best results, serve immediately. If needed, you can reheat leftover rolls at 375°F for 3–4 minutes to restore crispiness. Avoid microwaving as this makes them chewy rather than crispy.
- → What dipping sauce alternatives work well?
-
Sweet chili sauce provides a classic pairing. Plum sauce offers fruity sweetness. For spicy options, try sriracha mixed with soy sauce or a garlic-chili dipping sauce.
- → Can I prepare these ahead of time?
-
Assemble uncooked rolls up to 4 hours ahead, cover tightly with plastic wrap, and refrigerate. Air fry just before serving. You can also freeze uncooked rolls for up to 2 months—cook directly from frozen, adding 2–3 minutes to cooking time.
- → Why do some spring rolls open during cooking?
-
This usually happens when the cornstarch slurry isn't applied thoroughly along the final edge. Make sure to brush the entire edge and press firmly to seal. Also, avoid overfilling—too much filling creates pressure that can burst the wrapper.
