 Save
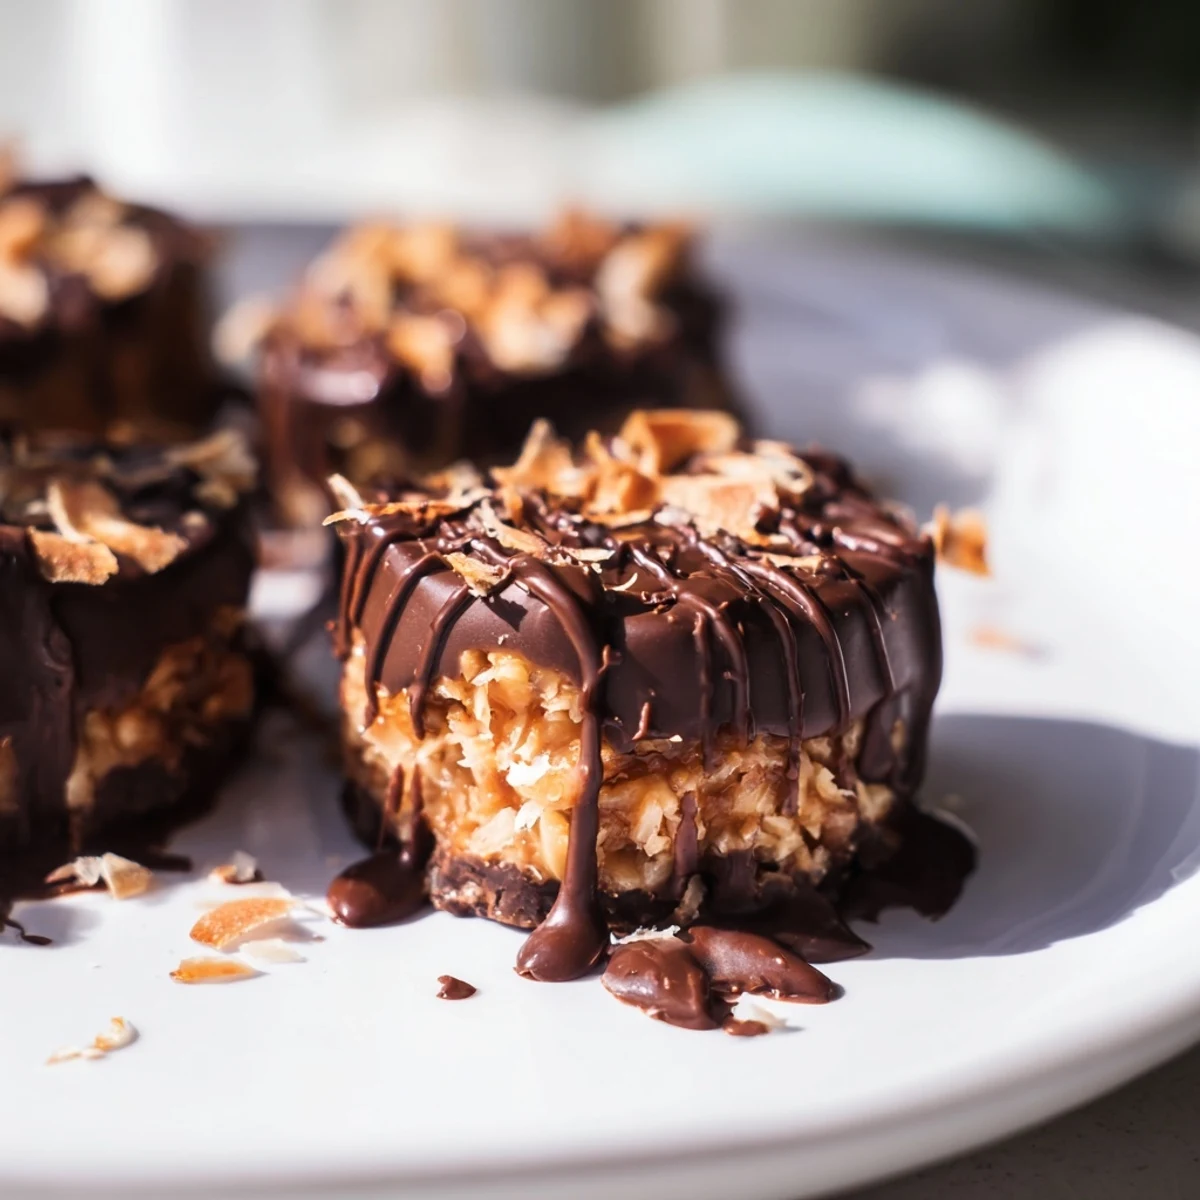
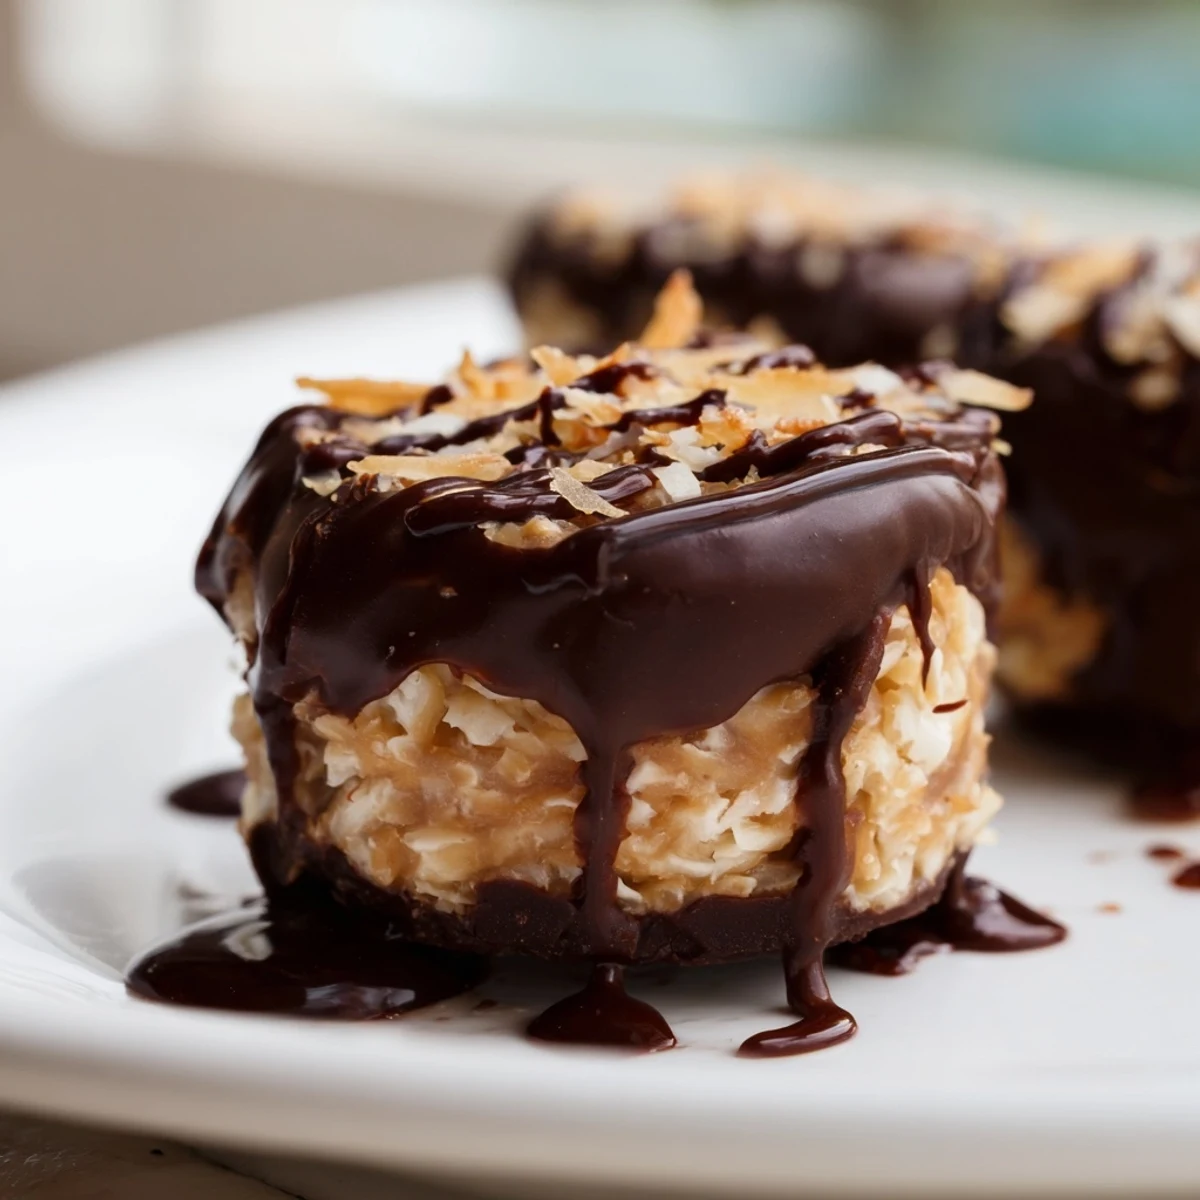
Save These no-bake treats capture all the flavors of classic Samoa cookies in bite-sized form. A date and coconut base forms the foundation, topped with a creamy almond butter caramel layer and finished with rich dark chocolate coating.
The process comes together quickly in a food processor. Simply blend the base ingredients, form into discs, add the caramel coconut topping, then dip in melted chocolate. Thirty minutes in the fridge sets everything perfectly.
Each bite delivers the perfect trio of chocolate, caramel, and toasted coconut. Naturally sweetened with dates and maple syrup, these make an ideal afternoon snack or dessert that feels indulgent while being made with wholesome ingredients.
Standing in my kitchen at midnight, chocolate somehow smeared across my forehead, I realized these bites might be better than the actual Girl Scout cookies. The caramel-coconut-chocolate combo hits that same nostalgic spot, but theres something deeply satisfying about making them yourself in twenty minutes flat.
I first made these for a last-minute book club meeting when someone mentioned they were craving Samoas. Watching everyone reach tentatively, then absolutely demolish the plate, reminded me that the simplest treats often create the biggest moments.
Ingredients
- 1 cup pitted dates: These become your sticky sweet binder, so make sure theyre soft and pliable
- 1 cup unsweetened shredded coconut: This forms the chewy foundation of your base layer
- 1/2 cup almond flour: Adds nutty richness and helps bind everything together
- 2 tbsp cocoa powder: Deepens the chocolate flavor without making it too sweet
- 1/4 tsp salt: Crucial for balancing all that sweetness
- 1/2 cup creamy almond butter: Creates that luscious caramel-like texture
- 2 tbsp maple syrup: Just enough to make the caramel layer sing
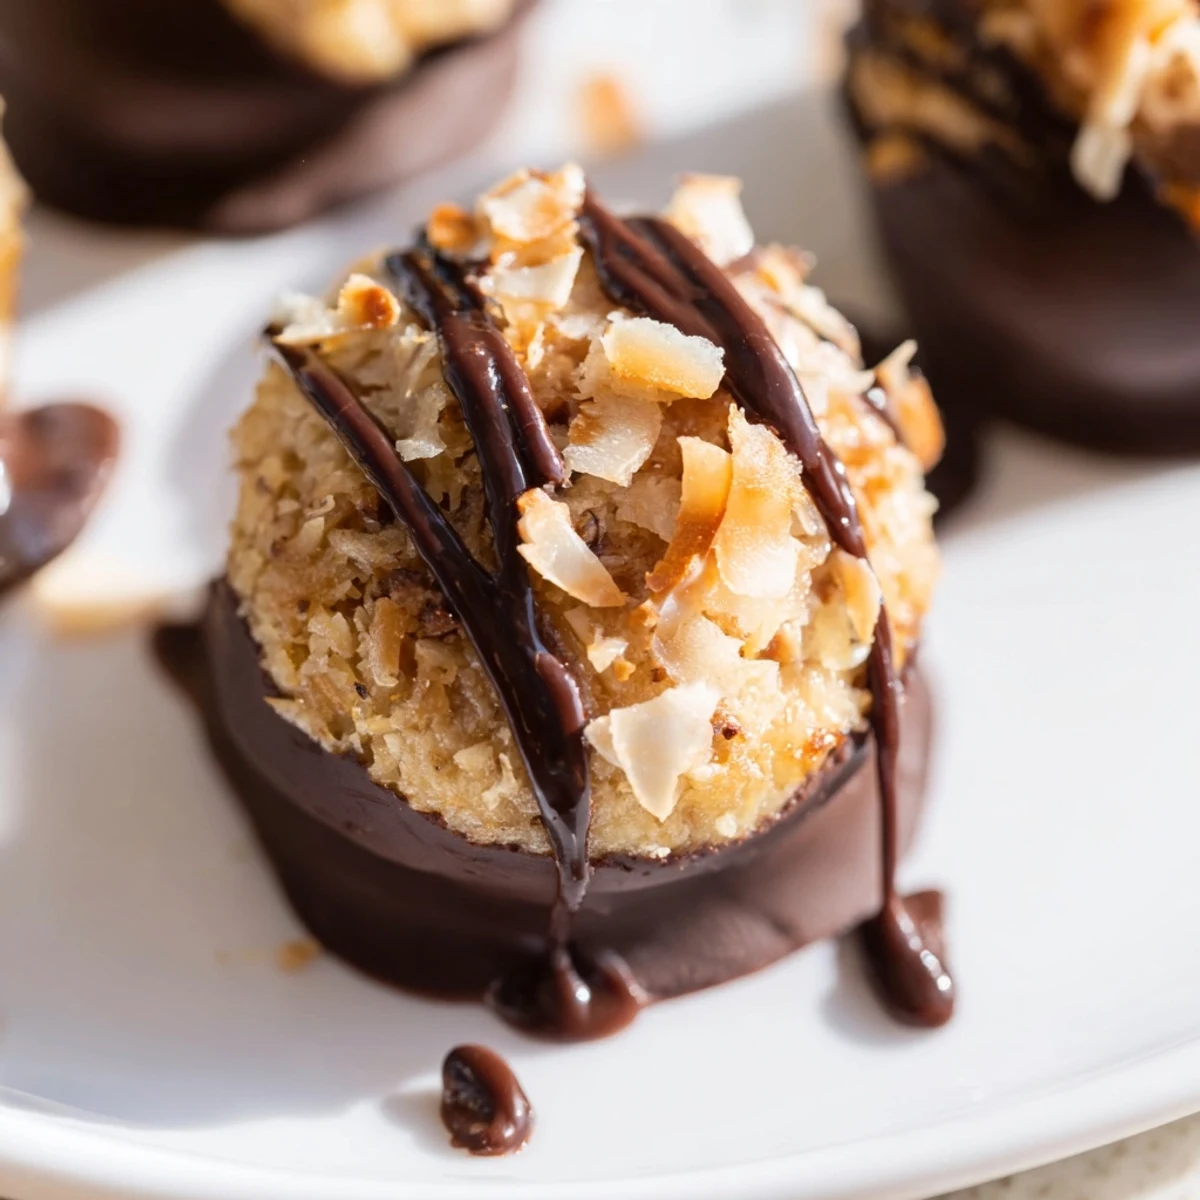
- 1/2 cup toasted coconut: Toast it until golden for that authentic Samoa flavor
- 3 oz dark chocolate: Quality matters here since its the finishing touch
- 1 tsp coconut oil: Makes your chocolate coating glossy and snap when you bite
Instructions
- Prep your station:
- Line a baking sheet with parchment paper before you start, because once your hands get sticky, youll thank yourself for thinking ahead
- Make the base:
- Pulse dates, coconut, almond flour, cocoa powder, and salt in your food processor until the mixture sticks together when you pinch it
- Shape the bites:
- Scoop about a tablespoon of mixture and press firmly into balls, flattening slightly into discs
- Whisk the caramel:
- Stir almond butter and maple syrup until completely smooth, then fold in your toasted coconut
- Build the layers:
- Top each base with a generous teaspoon of caramel, pressing gently so it stays put
- Melt the chocolate:
- Heat chocolate and coconut oil in 30 second bursts, stirring between each until silky smooth
- The chocolate dip:
- Dip each bite bottom into chocolate, return to parchment, then drizzle the rest artistically over the tops
- Set and serve:
- Refrigerate for at least 30 minutes until firm, then try to eat just one
 Save
Save My sister called me after making these, slightly breathless, asking why hers looked like rustic snowballs instead of the neat domes she remembered from childhood. We laughed about how the imperfections make them better somehow, like proof they were made by hand and not a factory machine.
Getting The Texture Right
The base mixture should stick together easily when you squeeze it, but not feel wet or gummy. If its too dry, add another date. If its too sticky, a sprinkle more almond flour will bring it back to that perfect cookie dough consistency.
Chocolate Coating Secrets
Work quickly once your chocolate is melted because it starts setting up fast. Keep a small bowl of warm water nearby to dip your spoon in if the chocolate starts getting too thick to drizzle beautifully.
Storage And Make Ahead Tips
These actually taste better on day two when the flavors have had time to meld together. Store them in the refrigerator where they will keep perfectly for up to a week, though in my house they barely last 24 hours.
- Place a piece of wax paper between layers if you stack them
- Let them sit at room temperature for 5 minutes before serving for the best texture
- These freeze beautifully for up to 3 months if you can manage to not eat them all first
 Save
Save Sometimes the simplest recipes, made with real ingredients and a little patience, end up being the ones that pull people back to your kitchen again and again.
Recipe FAQs
- → How long do these keep in the refrigerator?
-
Store in an airtight container in the refrigerator for up to 2 weeks. The chocolate coating helps them stay fresh. For longer storage, freeze for up to 3 months.
- → Can I make these nut-free?
-
Yes, substitute almond flour with oat flour and replace almond butter with sunflower seed butter. Always check your chocolate brand to ensure it's nut-free.
- → Do I need to toast the coconut for the caramel layer?
-
While not strictly necessary, toasting the coconut adds deeper flavor and crunch. Simply place shredded coconut in a dry skillet over medium heat for 3-5 minutes until golden, stirring frequently.
- → What type of chocolate works best for coating?
-
Dark chocolate with at least 70% cocoa creates the best contrast to the sweet caramel. Chocolate chips or chopped bars both work—the addition of coconut oil helps create a smooth, dippable consistency.
- → Can I skip the food processor step?
-
The food processor is essential for breaking down dates and creating a sticky base that holds together. Without one, you could finely chop dates by hand and knead ingredients together, though the texture will be less uniform.
- → Why did my mixture turn out too dry or crumbly?
-
This usually means your dates were not soft enough. Soak pitted dates in warm water for 10 minutes before draining and processing. Alternatively, add another tablespoon of maple syrup or a splash of water to bind the mixture.
