 Save
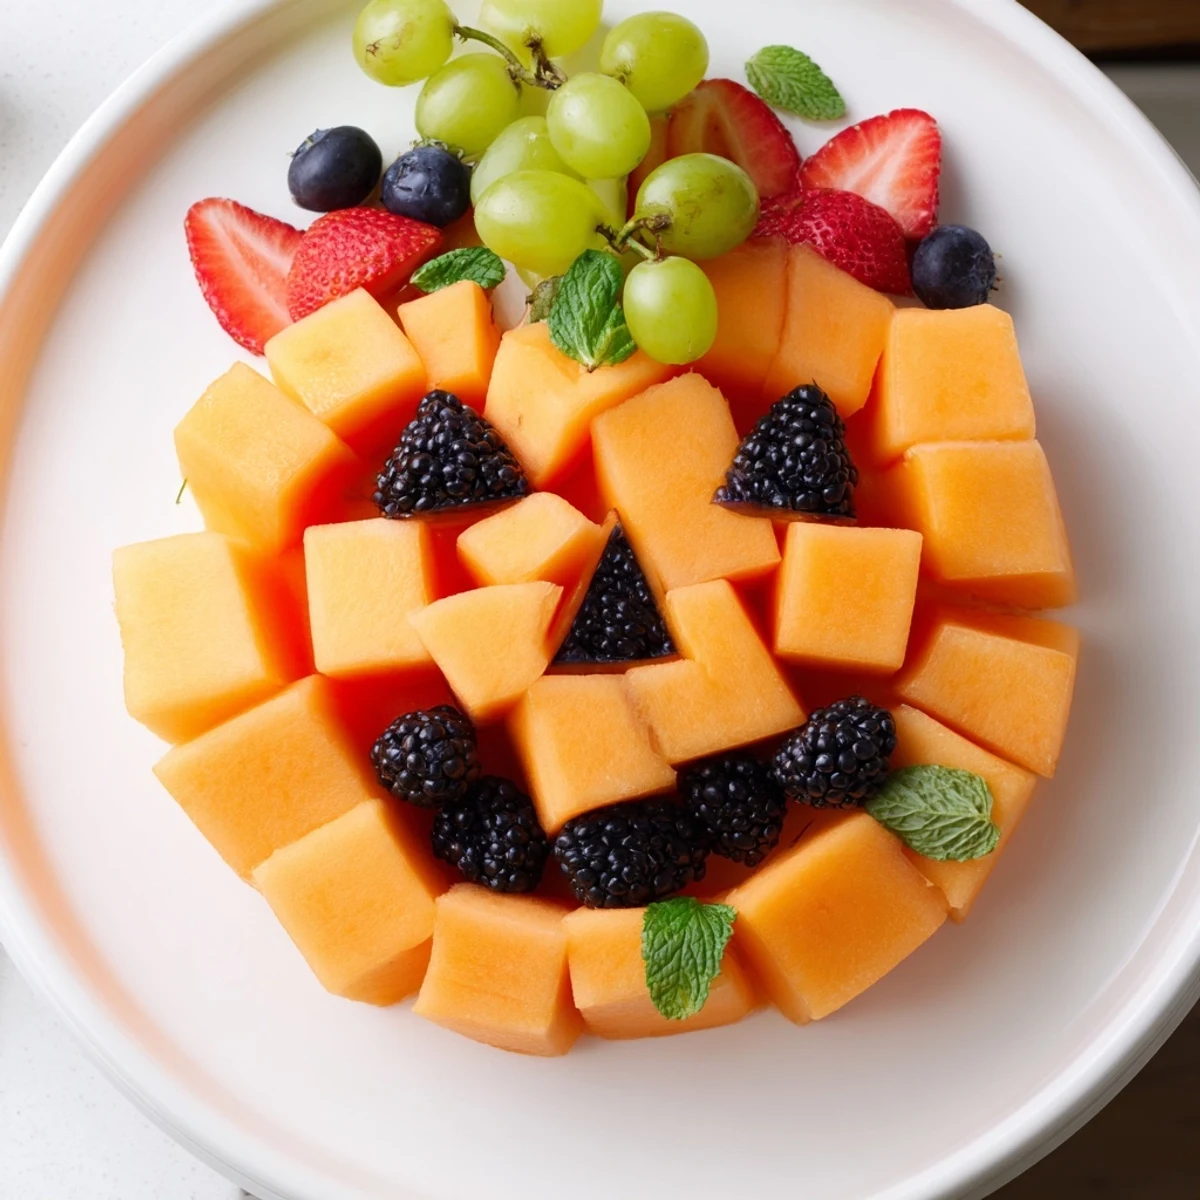
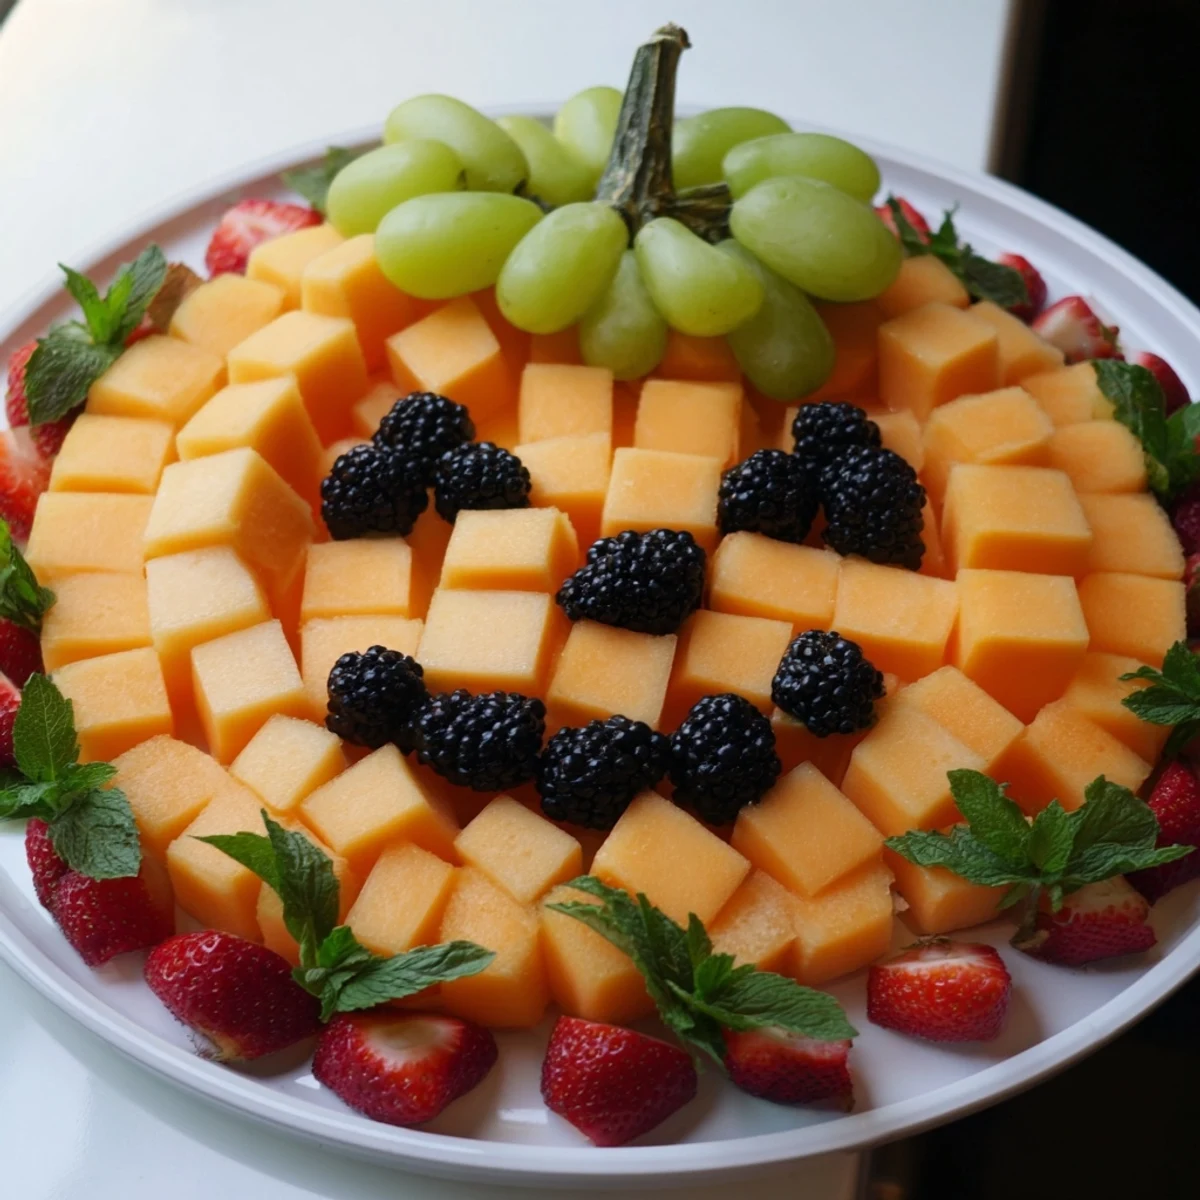
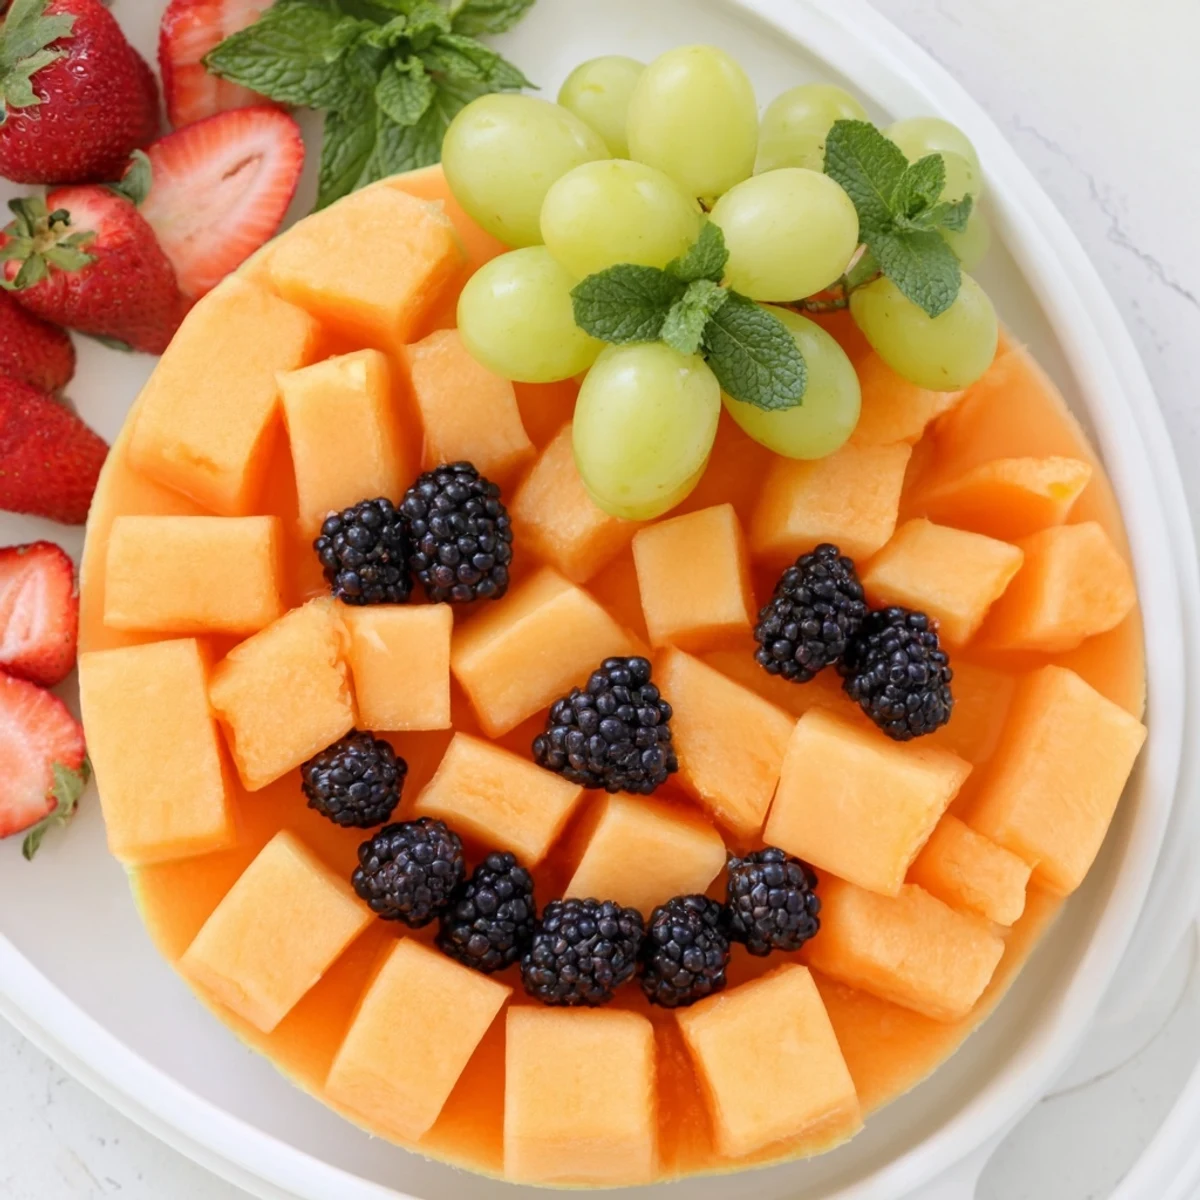
Save This delightful Halloween presentation transforms fresh cantaloupe, green grapes, blackberries, and strawberries into an adorable pumpkin-shaped centerpiece. The vibrant orange melon forms the body, while clustered grapes create a realistic stem. Dark berries add playful facial features that guests of all ages will love.
Assembly takes merely 20 minutes, requiring only knife skills to cube the cantaloupe and arrange components on a large round platter. The result is both eye-catching and nutritious—a refreshing alternative to traditional sweet treats at autumn gatherings.
Customize with additional seasonal fruits or serve alongside yogurt dip for extra appeal. Best assembled shortly before serving to maintain the arranged design and fresh appearance.
Last year my daughter announced she wanted to bring something healthy to her class Halloween party, and I honestly panicked at first. We stared at the cantaloupe on the counter until the shape hit both of us at the same time. The best part was watching her tiny hands carefully place each blackberry eye with such serious concentration.
I brought this to a neighborhood potluck and the adults kept lingering around it, mentioning how refreshing it looked among all the brown and orange desserts. One dad actually took photos before letting his kids dive in, which I took as the highest compliment possible.
Ingredients
- 4 cups cantaloupe, cubed: The orange flesh creates that perfect pumpkin color, and I learned buying fruit a few days ahead makes it easier to cut into neat cubes
- 1 ½ cups green grapes: These become your pumpkin stem and border, and seedless grapes work best since little fingers might be grabbing them
- 1 ½ cups blackberries or blueberries: These form your jack-o-lantern face, and blueberries give you more control over the shapes
- 1 cup strawberries, sliced: Optional but that red around the edge makes the whole platter pop against a white tablecloth
- Fresh mint leaves: scattered around like fallen leaves makes it look intentionally autumnal
Instructions
- Build your pumpkin base:
- Arrange those cantaloupe cubes in a round or slightly oval shape on your largest platter, leaving some space around the edges for garnish. Trust me, starting from the outside and working inward keeps the shape more even.
- Add the stem:
- Pile a small cluster of green grapes at the top center where your pumpkins stem would naturally sit. I usually make it slightly wider at the bottom so it looks attached, not just plopped on top.
- Create the face:
- Now the fun part, place blackberries or blueberries to make triangle eyes, a small nose, and that classic jagged smiling mouth. Step back occasionally to check the expression from a distance.
- Add your border:
- If you are using strawberries, arrange them around the outer edge like a festive frame. They look prettiest when you fan them out slightly rather than lining them up like soldiers.
- Final touches:
- Tuck mint leaves here and there around the platter to make it look like the pumpkin is sitting in a garden. Serve immediately or cover with plastic wrap and keep it chilled until showtime.
 Save
Save My niece now requests this for every family gathering, Halloween or not, and I love that it turned something so simple into our little tradition. The best moments happen when everyone creates their own unique jack-o-lantern face together.
Making It Your Own
Honeydew or mango can work instead of cantaloupe if you want different colors, and Ive seen people use pineapple chunks for the whole pumpkin too. The beauty is how adaptable this concept is to whatever fruit looks best at the store.
Presentation Secrets
A white platter makes those orange melon cubes really stand out, though any serving dish with high sides works for transport. If you are bringing this somewhere, consider assembling the pumpkin body at home and adding the face when you arrive.
Serving Suggestions
A small bowl of vanilla yogurt dip on the side makes this feel more like a treat, or you could offer chocolate sauce for the brave souls who want to go all in. The dip is totally optional though.
- Set out toothpicks with cute orange or black picks for easier grabbing
- Keep extra fruit nearby in case any pieces get sampled during assembly
- Take a photo right after finishing because these never look as perfect once the party starts
 Save
Save There is something magical about turning simple fruit into something that makes people genuinely smile before they even take a bite.
Recipe FAQs
- → How far in advance can I assemble this?
-
For optimal freshness and appearance, assemble within 1-2 hours of serving. The cut fruit may release juices that could soften the arrangement over time.
- → Can I use other fruits instead of cantaloupe?
-
Yes, honeydew melon, mango, or pineapple work well as substitutes. Choose fruits with firm texture and vibrant orange color for the best pumpkin effect.
- → What other fruits work for facial features?
-
Blueberries, raisins, chocolate chips, or grape halves all create excellent eyes, noses, and mouths. Select contrasting colors that stand out against the orange base.
- → How do I prevent browning on cut fruit?
-
Toss fruit pieces in a mixture of lemon juice and water (1:3 ratio) briefly before arranging. This natural citric acid helps maintain fresh color without altering taste significantly.
- → What size platter works best?
-
A 14-16 inch round platter provides adequate space. Larger trays allow more generous spacing around the pumpkin design, while smaller ones create a tighter, more compact appearance.
- → Can I add other elements to the display?
-
Candy corn, pretzel sticks, or cheese shapes complement the fruit theme beautifully. Consider adding small plastic Halloween figurines around the perimeter for extra festive flair.
