 Save
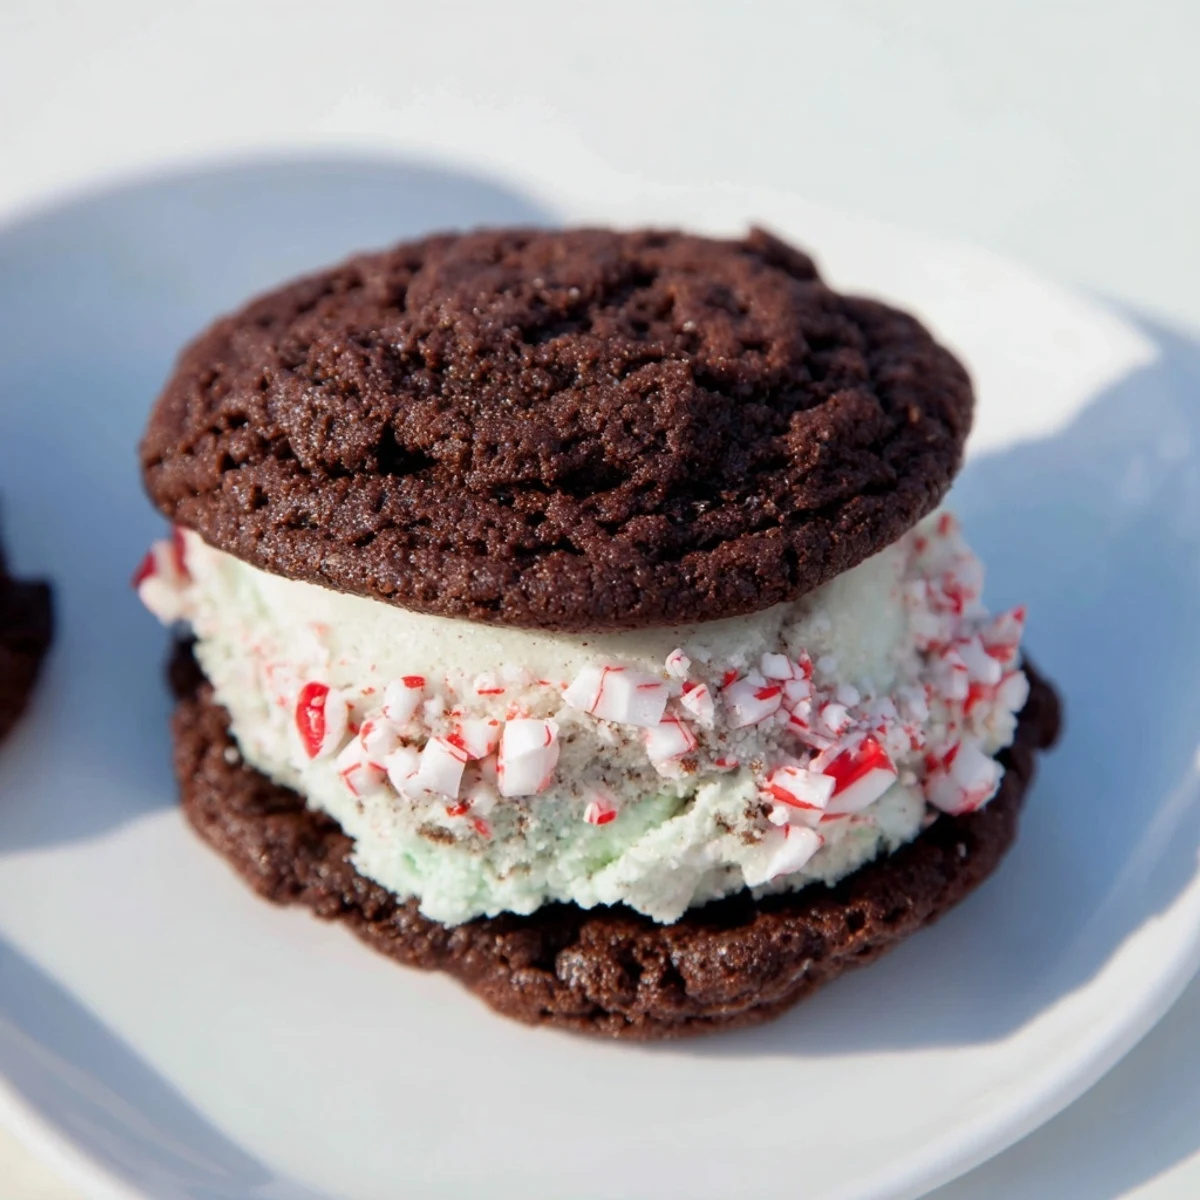
Save Enjoy a delightful pairing of smooth peppermint ice cream and chewy chocolate cookies. This treat combines rich cocoa flavors with refreshing peppermint notes, making it ideal for festive occasions or warm summer days. Soft, yet crunchy, these sandwiches come together with simple mixing, baking, and freezing steps, delivering a pleasing texture contrast. Enhance the edges with crushed peppermint candies or mini chocolate chips for an extra burst of flavor.
I discovered peppermint ice cream sandwiches on a snowy December afternoon at my grandmother's house, where she'd left a plate of homemade chocolate cookies cooling on the counter. That same winter, I decided to churn my own peppermint ice cream for the first time, and the moment I pressed those two warm cookies together with the cold, creamy filling, I understood why this combination had become a holiday tradition in so many households. The contrast of textures, the burst of peppermint against dark chocolate, the way it melted on your tongue—it felt like tasting childhood memories all over again.
I still remember making these with my kids for the first time, watching their eyes light up when they bit through the chewy chocolate cookie into the peppermint dream inside. We made a mess of the kitchen, got peppermint candy dust everywhere, and laughed when the ice cream softened faster than we could assemble. But when we sat down with warm mugs of cocoa and these cold, perfect sandwiches, everyone agreed it was worth every moment of chaos.
Ingredients
- All-purpose flour (1 cup): This is your structure. Don't skip sifting it with the cocoa powder, as it helps prevent lumps and creates a more tender crumb.
- Unsweetened cocoa powder (1/2 cup): The soul of your cookies. Use good quality cocoa—you'll taste the difference. I learned this the hard way after one batch tasted thin and flat.
- Baking soda (1/2 teaspoon): This is your leavening agent and it also helps develop that chewy texture we're after. Don't confuse it with baking powder.
- Salt (1/4 teaspoon for cookies, 1/4 teaspoon for ice cream): Acts as a flavor amplifier. You won't taste salt, but you'll taste what it does for everything else.
- Unsalted butter (1/2 cup): Softened means room temperature, not melted. This is crucial for creaming with sugar and creating the right texture.
- Granulated sugar (3/4 cup for cookies, 2/3 cup for ice cream): In cookies, it's part of the structure; in ice cream, it prevents the mixture from freezing too hard.
- Large egg (1): Binds everything together and adds slight lift. Room temperature eggs incorporate better into the dough.
- Vanilla extract (1 teaspoon): A quiet note that makes chocolate taste more chocolate-y. Use pure vanilla, not imitation.
- Heavy cream (2 cups) and whole milk (1 cup): The cream makes ice cream rich and silky; the milk keeps it from being too heavy. This ratio is balanced perfection.
- Pure peppermint extract (1 teaspoon): A little goes a long way here. I once used a tablespoon and it tasted like eating a candy cane whole. Less is genuinely more.
- Red food coloring (3-4 drops, optional): Adds visual charm but isn't essential. The peppermint flavor stands on its own.
- Crushed peppermint candies (1/2 cup): These give texture, flavor bursts, and visual interest. Crush them into varied sizes—some fine powder, some chunky pieces.
Instructions
- Make your peppermint ice cream first:
- In a mixing bowl, whisk together the heavy cream, whole milk, sugar, and salt until the sugar completely dissolves—this takes about a minute of steady whisking. You want it smooth and sweet to taste. Now add your peppermint extract and a few drops of red food coloring if you want that festive pink hue. Stir it together and let the flavors get to know each other for a moment. Then pour everything into your ice cream maker and churn according to the manufacturer's instructions, which usually takes 20-25 minutes. In those final 2 minutes, when the ice cream is almost set, fold in your crushed peppermint candies, letting them distribute throughout. Transfer it to a freezer container and give it at least 2 hours to firm up completely.
- Preheat and prepare for cookies:
- Set your oven to 350°F (175°C) and line two baking sheets with parchment paper. This step matters because parchment paper prevents sticking and bakes more evenly than bare sheets.
- Mix your dry ingredients:
- In a bowl, whisk together the flour, cocoa powder, baking soda, and salt. Whisking incorporates air and distributes the baking soda evenly so every cookie rises the same way. This is the moment the kitchen smells wonderful.
- Cream butter and sugar:
- In a separate large bowl, beat together softened butter and sugar until it's light, fluffy, and pale—about 3-4 minutes with an electric mixer. This process is called creaming, and it's where tiny air pockets get trapped, making your cookies tender. Don't rush it.
- Add egg and vanilla:
- Break your egg into the creamed mixture and add the vanilla extract. Beat until everything is fully combined and the mixture looks smooth and uniform. A few streaks of egg is fine, but keep beating until those are gone.
- Combine wet and dry:
- Gradually add the dry mixture to the wet ingredients, stirring just until combined. This is important: overmixing develops gluten, which makes cookies tough instead of chewy. When you stop seeing dry flour, you're done. The dough should be soft and slightly sticky.
- Scoop and shape:
- Using a tablespoon or small cookie scoop, form balls of dough and place them on your prepared baking sheets, spacing them about 2 inches apart. Flatten each ball slightly with the bottom of a glass or your palm—these will be your cookie bases for sandwiches, so you want them somewhat uniform in thickness.
- Bake until set:
- Bake for 10-12 minutes. You're looking for cookies that appear set on top but still have a tiny bit of softness when you press them gently. They'll continue to cook slightly as they cool. Remove from the oven and let them cool on the baking sheets for a few minutes, then transfer to a wire rack to cool completely. This is crucial—warm cookies are too fragile for sandwiches.
- Assemble your sandwiches:
- When everything is cold, let your ice cream soften at room temperature for just a minute or two so it's easy to work with but still holds its shape. Place a generous scoop of peppermint ice cream between two cookies and gently press them together. The cookies will warm slightly and create a little seal. Repeat until you've used all your cookies and ice cream.
- Final freeze:
- Wrap each sandwich in parchment paper or wax paper and return them to the freezer for at least 30 minutes. This firms everything up and makes them much easier to handle and eat without the ice cream sliding out.
 Save
Save Years later, these ice cream sandwiches became the thing my family requested at every celebration. There's something about serving food you made yourself, from scratch, that transforms it from a dessert into a gift.
The Perfect Cookie Texture
The key to these cookies is understanding that they'll continue cooking after you pull them from the oven. What feels slightly underdone when you touch it will set up perfectly as it cools, giving you that ideal chewy-but-set texture that holds ice cream without crumbling apart. The cocoa powder actually helps with this because it absorbs some moisture, creating a tender crumb that's still structurally sound. I used to overbake mine, thinking I needed them firmer, but I learned that slightly underbaked chocolate cookies are the way to a texture that makes sense.
Customizing Your Peppermint Ice Cream
While the classic peppermint is perfect, I've experimented with variations that always work beautifully. You can swap the peppermint extract for spearmint if you prefer something gentler, or add a tablespoon of finely chopped dark chocolate to the churning ice cream for a chocolate-peppermint swirl. Some friends crush regular candy canes instead of commercial peppermint candies, and it works just as well if you pound them fine enough. The ice cream is forgiving because the peppermint flavor is what people are really seeking, and the base is balanced enough to handle these substitutions.
Making This Easier to Love
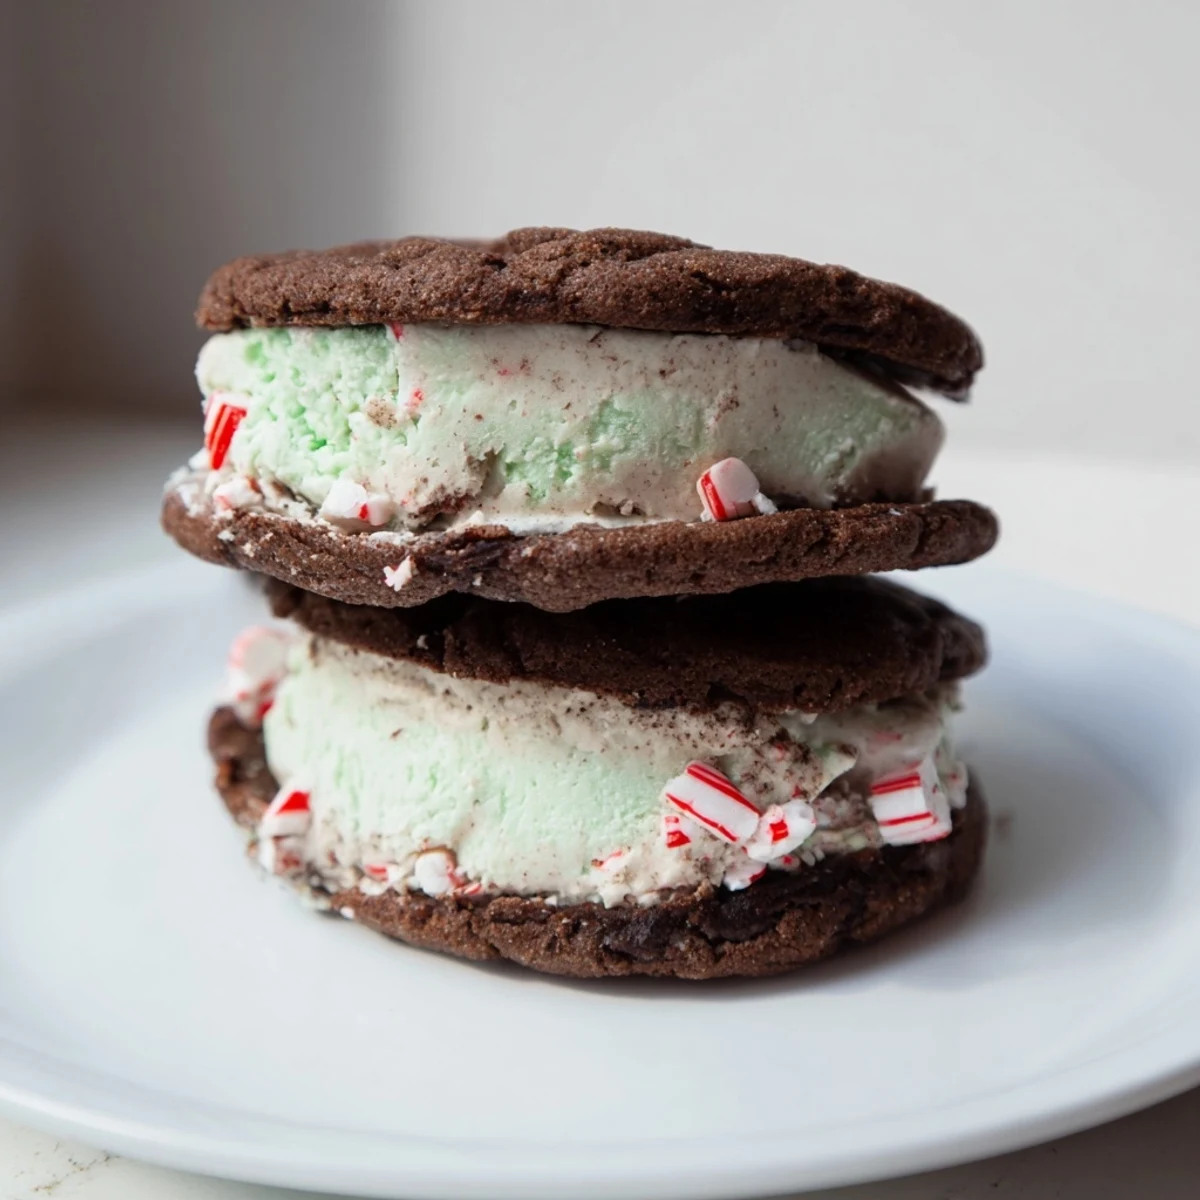
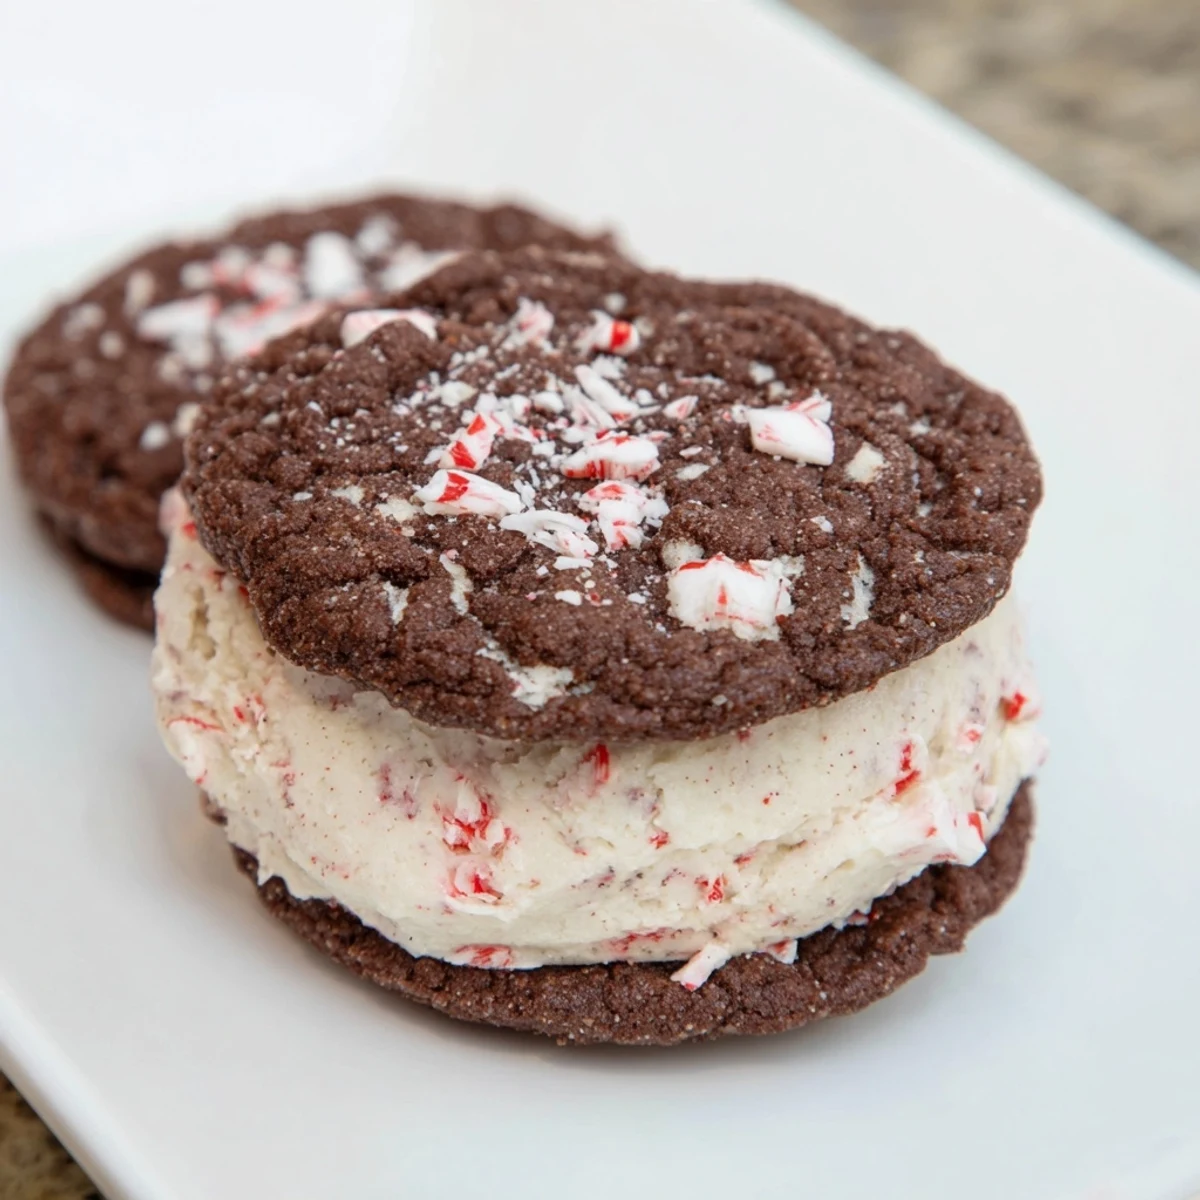
The beauty of this recipe is that you can break it into steps. Make the cookies one day, the ice cream the next, and assemble whenever you're ready. This actually improves things because both components freeze solid, making assembly easier and the sandwiches more stable. For extra visual impact and texture, I roll the edges of each finished sandwich in additional crushed peppermint candies or mini chocolate chips before the final freeze. It's a small step that makes them look like they came from a bakery.
- Store these sandwiches in an airtight container, and they'll keep frozen for up to two weeks, though they rarely last that long in my house.
- If you don't have an ice cream maker, you can create the ice cream using the plastic bag method—seal the mixture in a freezer bag, place it in a larger bag filled with ice and rock salt, and shake for about 15 minutes.
- Let these sit at room temperature for just 2-3 minutes before serving so the ice cream softens enough to taste its full flavor while the cookies stay pleasantly chewy.
 Save
Save These peppermint ice cream sandwiches remind me that sometimes the most meaningful food is the kind you make with your own hands, flavored with a little patience and a lot of love. They're festive without being complicated, impressive without being fussy.
Recipe FAQs
- → Can I use gluten-free flour for the cookies?
-
Yes, substituting gluten-free flour works well and maintains the cookies' texture.
- → How can I make the peppermint flavor stronger?
-
Increase the amount of pure peppermint extract or add more crushed peppermint candies when folding into the ice cream.
- → What is the best way to store these sandwiches?
-
Keep them in an airtight container in the freezer for up to two weeks to maintain freshness.
- → Can I prepare the cookies ahead of time?
-
Absolutely, cookies can be baked in advance and stored at room temperature or frozen until ready to assemble.
- → Are there alternatives to using an ice cream maker?
-
Without an ice cream maker, you can freeze the mixture in a shallow container, stirring every 30 minutes until smooth and firm.
