 Save
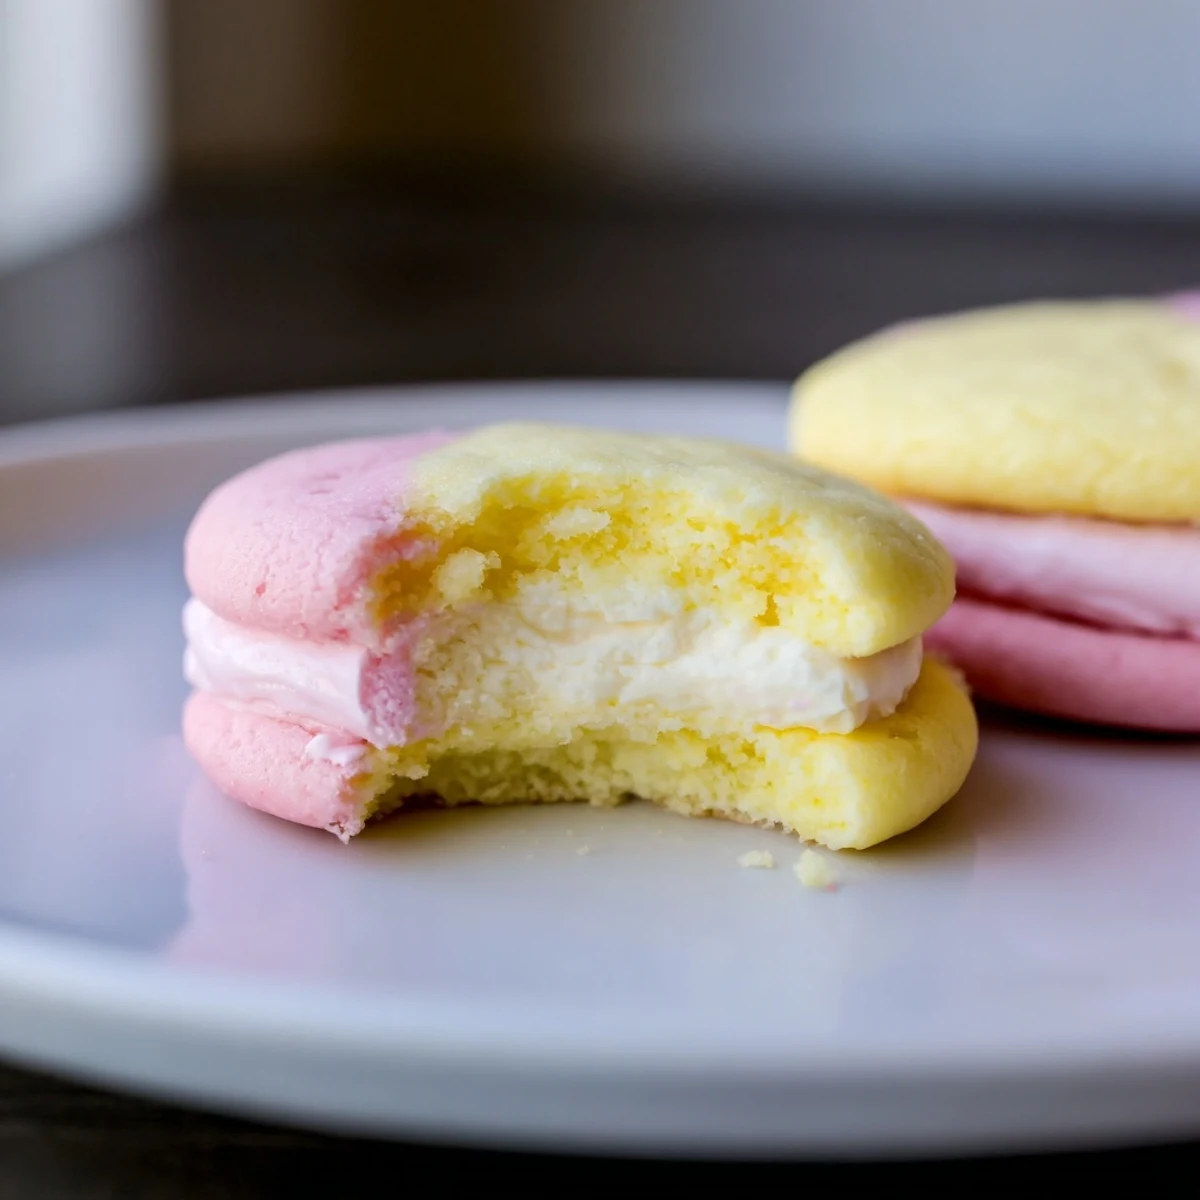
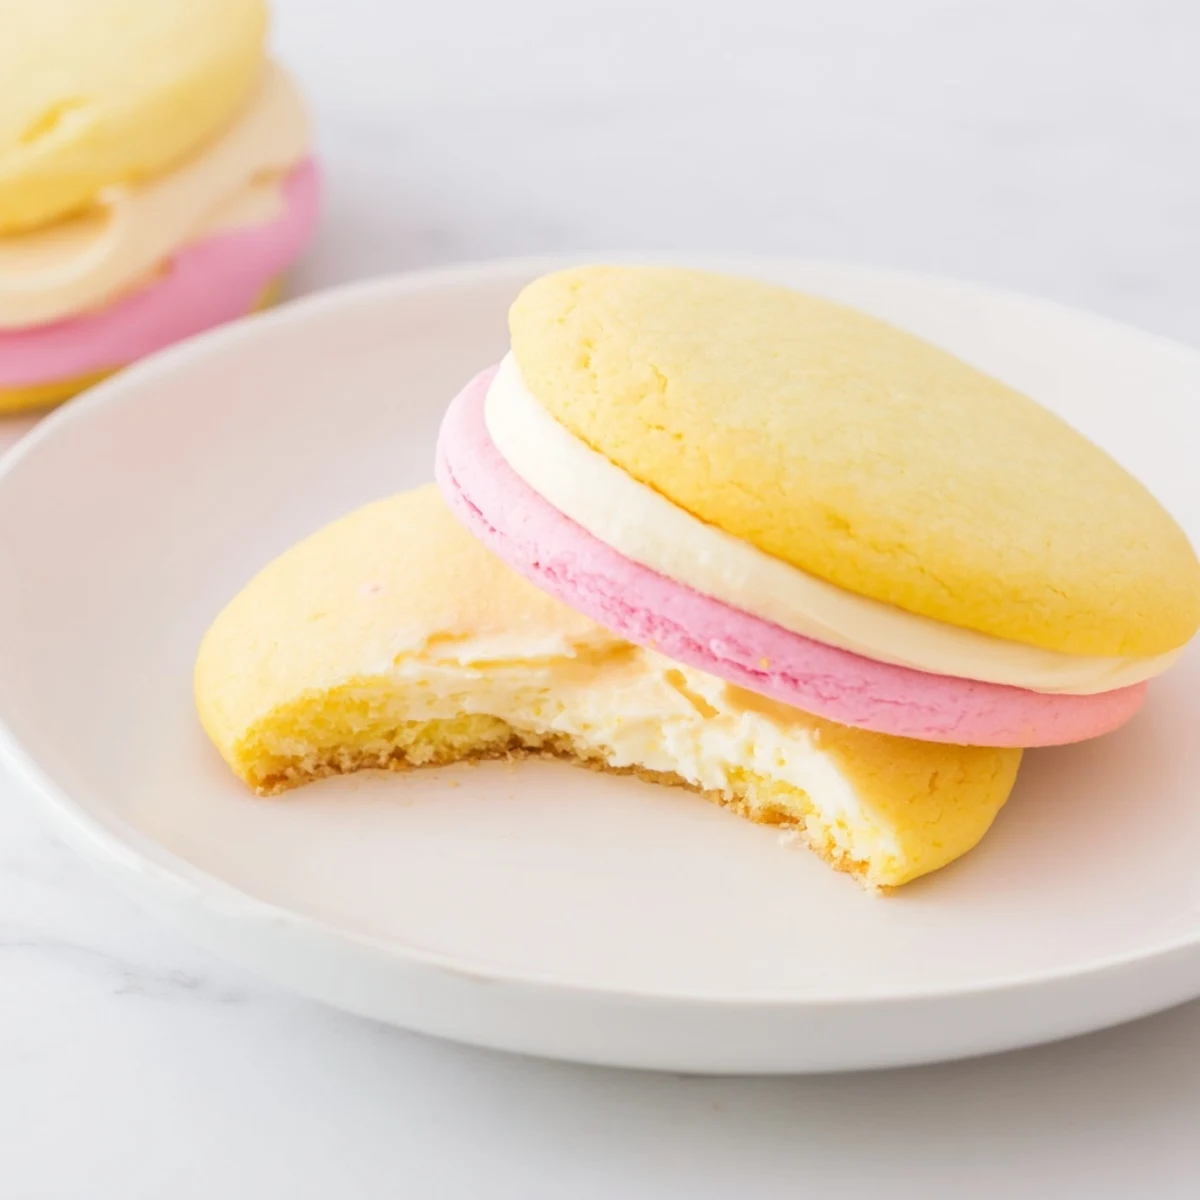
Save Create these beautiful pastel-hued sandwich cookies with just 25 minutes of prep time. The soft sugar cookie dough gets divided and tinted with gel food coloring in pink, yellow, blue, green, or purple for a stunning rainbow effect. Each baked cookie is paired with a fluffy vanilla buttercream filling that perfectly complements the buttery sweetness of the cookies.
These handheld treats are ideal for Easter celebrations, spring gatherings, or anytime you want something colorful and cheerful. The dough comes together quickly in a stand mixer, and while the cookies bake and cool, you can whip up the simple buttercream filling.
Customize the colors to match your party theme, add citrus zest to the dough for brightness, or swap the vanilla filling for lemon or strawberry frosting. These delightful sandwiches store well and can be assembled the day before serving.
The first time I made these pastel sugar cookie sandwiches was actually by accident. I had meant to bake simple round cookies for my daughter's spring birthday party, but then I found those forgotten gel food coloring tubes tucked in the back of my pantry. Something about the soft pinks, mint greens, and buttery yellows felt too perfect to resist. That afternoon turned into the most colorful kitchen experiment I'd done in years.
Last Easter, my niece helped me divide the dough into five bowls. Her hands were stained blue and pink by the end, but she took such pride in carefully mixing each color until it was perfectly uniform. We ended up with more than 30 sandwich cookies stacked on the counter, and she kept sneaking the broken ones with a wink.
Ingredients
- 2 1/2 cups all-purpose flour: I've learned that measuring flour by spooning it into the cup rather than scooping directly keeps these cookies from becoming dense
- 1/2 tsp baking powder: Just enough to give the cookies a gentle lift without making them too cakey
- 1/4 tsp salt: This tiny amount balances the sweetness and makes all the flavors pop
- 1 cup unsalted butter: Room temperature is non-negotiable here. Cold butter creates a dough that fights back and never quite smooths out
- 1 cup granulated sugar: Creaming this properly with the butter is what gives the cookies their tender texture
- 1 large egg: Bring this to room temperature too so it incorporates seamlessly into the batter
- 2 tsp pure vanilla extract: Do not skimp here. The real stuff makes these taste like childhood
- 1/2 tsp almond extract: Completely optional but I love how it adds a subtle sophistication that people cannot quite put their finger on
- Gel food coloring: Gel colors give you those soft pastel shades without adding liquid that could throw off the dough consistency
- 1/2 cup unsalted butter: For the buttercream. Again room temperature makes all the difference between smooth frosting and a curdled mess
- 2 cups powdered sugar: Sifting this first prevents those tiny lumpy surprises in your finished buttercream
- 1 tbsp milk or heavy cream: Start with less. You can always add more but you cannot take it back
- 1 tsp pure vanilla extract: Because vanilla buttercream is a classic for a reason
- Pinch of salt: Just a pinch keeps the filling from being cloyingly sweet
- Sprinkles: Optional but let's be honest. Sprinkles make everything better
Instructions
- Get your oven ready:
- Preheat to 350°F and line two baking sheets with parchment paper. I skip this step exactly once before learning my lesson about stuck cookies forever.
- Whisk the dry ingredients:
- In a medium bowl combine the flour baking powder and salt. Set this aside so you do not have to stop mid-recipe to hunt for your measuring spoons.
- Cream butter and sugar:
- Beat the butter and sugar together for a full 2 to 3 minutes. Seriously time it. This step is what creates those tender air pockets that make these cookies melt in your mouth.
- Add the wet ingredients:
- Mix in the egg vanilla and almond extract if using until everything is combined. Scrape down the bowl so no flour gets left behind.
- Combine dough:
- Gradually add the flour mixture mixing just until you no longer see streaks of dry ingredients. Overmixing at this stage makes tough cookies and nobody wants that.
- Create the rainbow:
- Divide dough into 4 or 5 bowls and tint each with a different pastel color. The gel colors are concentrated so start tiny. You can always add more but you cannot undo too much.
- Scoop and space:
- Portion dough into tablespoon sized balls placing them 2 inches apart on your prepared baking sheets. This seems like too much space until the cookies spread in the oven.
- Flatten slightly:
- Use your palm to gently press each ball just enough to flatten the top. Not too much or they become paper thin.
- Bake to perfection:
- Bake for 10 to 12 minutes until edges are set but centers still look slightly soft. They continue cooking on the hot pan so trust your instincts.
- Cool completely:
- Let them rest on the baking sheet for 5 minutes then transfer to a wire rack. Warm cookies melt buttercream into a sad puddle so patience here pays off.
- Make the buttercream:
- Beat the butter until creamy then add powdered sugar vanilla salt and milk. Whip until fluffy adding more milk only if needed for spreading consistency.
- Assemble the sandwiches:
- Spread or pipe buttercream onto the flat side of half the cookies then top each with another cookie. The ones that crack during assembly are just quality control samples.
- Add the finishing touch:
- Roll the edges in sprinkles if you want extra festivity. The sprinkles that fall on the counter count as the baker's fee.
 Save
Save My friend Sarah made these for her wedding shower in lavender and soft yellow. Guests kept asking where she ordered them. She just laughed and said they were the easiest thing on the menu.
Making These Ahead
The cookie dough actually freezes beautifully. I sometimes make a double batch and portion half into balls to freeze raw. Just add an extra minute or two to the baking time straight from the freezer.
Color Combinations That Work
For baby showers I love soft pink mint green and buttery yellow. Christmas calls for red and green obviously but keep them pastel for that vintage feel. Really any combination looks festive as long as you stick to those soft muted tones.
Storage And Serving
Once assembled these are best enjoyed within 24 hours. The cookies start softening as they absorb moisture from the buttercream. Store in a single layer if possible or separate layers with parchment paper.
- Unfilled cookies keep in an airtight container for up to 5 days
- The buttercream can be made 2 days ahead and kept at room temperature
- Freeze filled sandwiches wrapped individually for up to a month
 Save
Save Every time I bring these to gatherings someone asks for the recipe. There is something about those pastel colors that makes people assume these took hours to create. Your secret is safe with me.
Recipe FAQs
- → How far in advance can I make these pastel sandwich cookies?
-
Bake the cookies up to 3 days ahead and store them in an airtight container at room temperature. Make the buttercream filling 1-2 days in advance and refrigerate it. Let the filling come to room temperature and give it a quick whip before assembling. For best texture, assemble the sandwiches no more than 24 hours before serving.
- → Can I freeze the cookie dough or baked cookies?
-
Yes, both freeze beautifully. Freeze portioned dough balls on a baking sheet, then transfer to a freezer bag for up to 3 months. Bake from frozen, adding 1-2 minutes to the baking time. Baked cookies can be frozen unfilled for up to 2 months. Thaw at room temperature before filling with buttercream.
- → What's the best way to achieve vibrant pastel colors?
-
Use gel food coloring rather than liquid drops for the most intense hue without thinning the dough. Start with a tiny amount on a toothpick and gradually add more until you reach your desired shade. Gel coloring produces more concentrated color, so a little goes a long way. Work quickly once the coloring is added to prevent it from staining your hands.
- → Why did my cookies spread too much in the oven?
-
Overly soft dough or warm butter can cause excessive spreading. Chill the dough portions for 15-20 minutes after coloring if your kitchen is warm. Also ensure you're measuring flour correctly—spoon it into the measuring cup and level off rather than scooping directly, which can compact the flour and throw off ratios.
- → Can I make these without an electric mixer?
-
Yes, though it requires more elbow grease. Use a sturdy wooden spoon to cream the butter and sugar until light and fluffy—this may take 5-7 minutes of vigorous mixing. For the buttercream, you can use a whisk to beat the butter by hand, but a fork works in a pinch. The results will still be delicious, just with slightly less aeration.
- → What other frosting flavors pair well with these cookies?
-
Lemon buttercream adds bright citrus notes that complement the sweetness. Strawberry frosting using freeze-dried strawberry powder creates a pretty pink filling. Chocolate ganache or cream cheese frosting also work beautifully. For something different, try a light swiss meringue buttercream for a less sweet finish.
