 Save
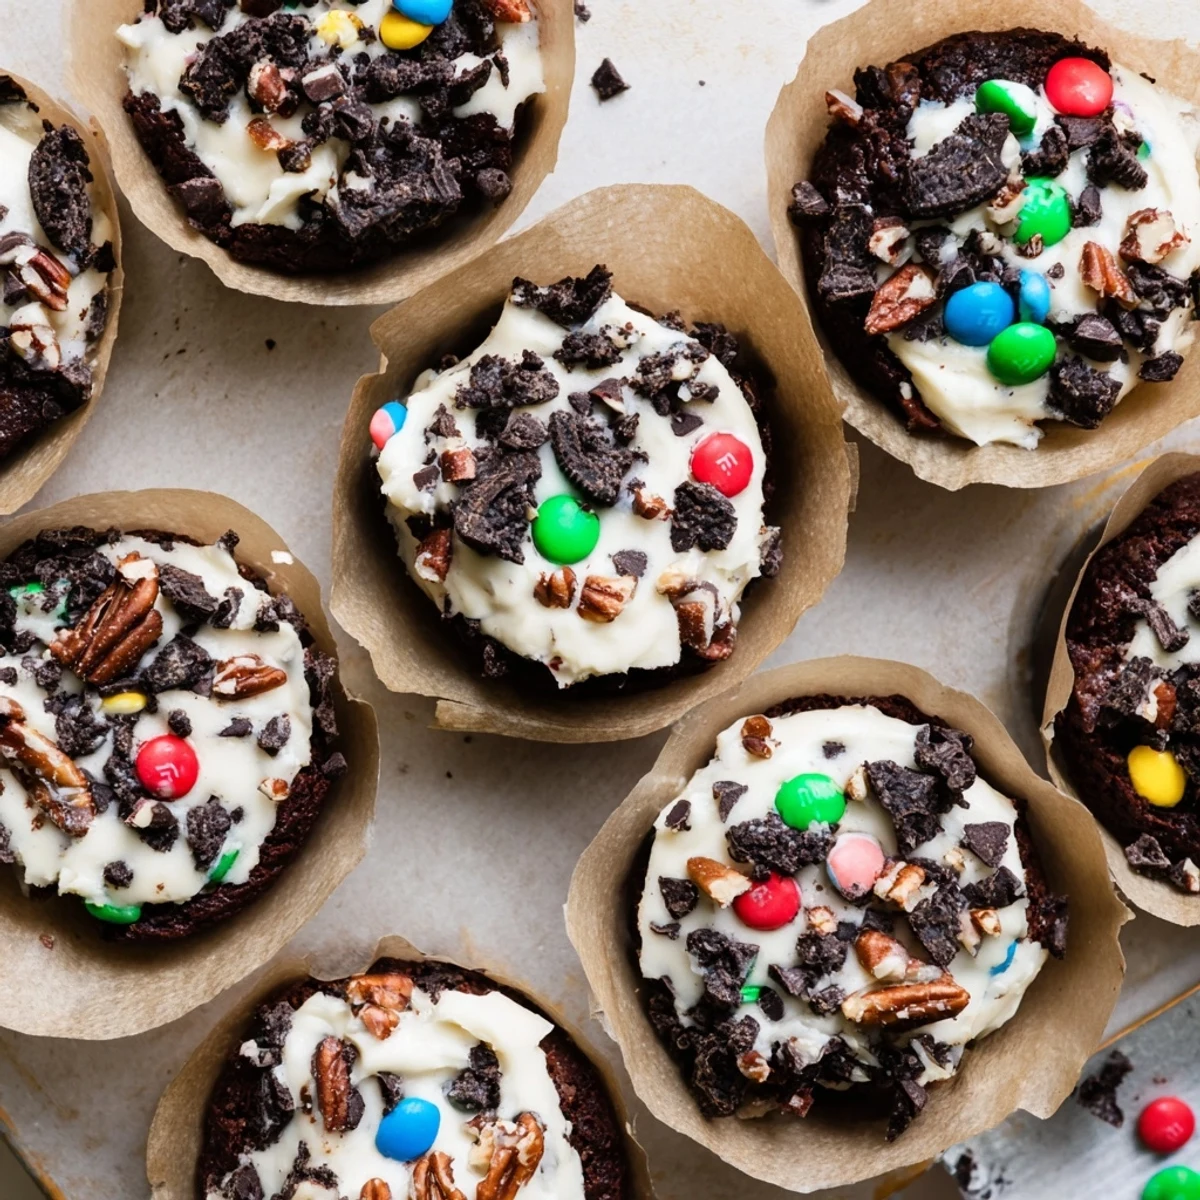
Save These loaded brownie cheesecake cups combine the best of both worlds—a rich, fudgy chocolate brownie base topped with smooth, velvety cheesecake filling. Each cup is generously loaded with mini chocolate chips, chopped pecans, crushed Oreos, and colorful M&Ms for maximum flavor and texture. The contrast between the dense, chocolatey brownie and light, creamy cheesecake creates an irresistible dessert that's perfect for gatherings, celebrations, or whenever you need an impressive sweet treat.
Ready in just 50 minutes with simple ingredients, these handheld desserts are easier to serve than traditional bars or cakes. Chill them for at least an hour before serving to achieve the perfect texture—the brownie stays dense while the cheesecake becomes cool and refreshing.
My college roommate introduced me to the magic of brownie cheesecake swirls, but these cups came from a happy accident when I ran out of baking pans. That night, standing in my tiny kitchen with mismatched bowls and a half-empty bag of M&Ms, I discovered something brilliant. The muffin tin made everything portion-perfect, and suddenly a dessert that usually demanded careful slicing became grab-and-go bliss. Now they're my go-to when I need something impressive but simple.
Last summer, I made these for a backyard barbecue and watched them disappear in under ten minutes. My friend Sarah, who claims she doesn't even like desserts that much, went back for thirds and asked if I'd teach her the recipe. There's something about that combination of rich chocolate and tangy cheesecake that makes people's eyes light up, especially when they can grab their own personal cup instead of waiting for someone to cut slices.
Ingredients
- 120 g unsalted butter: Melted until golden and slightly cooled helps create that glossy, crackly brownie top we all love
- 150 g granulated sugar and 75 g brown sugar: The combo gives you crackly edges from the white sugar and deep molasses flavor from the brown
- 2 large eggs: Room temperature eggs blend better and help create that beautiful shiny brownie surface
- 1 tsp vanilla extract: Don't skimp here, real vanilla makes the chocolate taste more chocolatey
- 65 g unsweetened cocoa powder: Dutch-processed cocoa gives the deepest, smoothest chocolate flavor without any bitterness
- 65 g all-purpose flour: Just enough to hold everything together while keeping that fudgy texture we're after
- 1/2 tsp salt: This tiny amount makes all the chocolate flavors pop and balances the sweetness
- 225 g cream cheese: Make sure it's properly softened so your filling will be silky smooth without any lumps
- 60 g granulated sugar: Just enough sweetness to complement the cheesecake tang without overwhelming the chocolate base
- 1 large egg: Gives the cheesecake layer structure while keeping it creamy and luxurious
- 1 tsp vanilla extract: Brightens the rich cheesecake filling and pairs perfectly with the chocolate
- Mini chocolate chips, chopped nuts, crushed Oreos, mini M&Ms: Go wild here or stick to classics, these toppings make each cup a surprise
Instructions
- Get your oven ready:
- Preheat to 175°C and line your muffin tin with paper liners, taking a moment to press them into the cups firmly so they hold their shape as the batter rises.
- Make the brownie magic:
- Melt butter in a medium bowl until it's hot and glossy, then whisk in both sugars until the mixture looks like wet sand and feels warm to the touch.
- Add the wet ingredients:
- Beat in the eggs one at a time, followed by vanilla, mixing until everything is incorporated and the batter starts to thicken slightly.
- Bring in the dry stuff:
- Sift cocoa powder, flour, and salt directly into the bowl and fold gently until just combined, stopping when those last flour streaks disappear.
- Layer one:
- Divide brownie batter among your muffin cups, using about one heaping tablespoon per cup and pressing it down gently with the back of a spoon to create an even base.
- Whip up the cheesecake filling:
- Beat softened cream cheese until completely smooth, then add sugar, egg, and vanilla, mixing until creamy and free of any lumps.
- Layer two:
- Spoon about one tablespoon of cheesecake mixture over each brownie base, smoothing the tops with your spoon or a small offset spatula.
- Load on the toppings:
- Press a generous pinch of your chosen toppings into each cup, letting them sink slightly into the cheesecake layer so they bake in place.
- Bake to perfection:
- Bake for 22-25 minutes until cheesecake is set but still slightly jiggly in the center and brownie edges are firm.
- Patience pays off:
- Cool in the pan for 10 minutes before carefully transferring to a wire rack, then chill for at least one hour so the flavors can meld and textures can fully develop.
 Save
Save My daughter asked to help with the toppings on her birthday, and we made a game of designing each cup like a little masterpiece. She arranged the M&Ms in rainbow patterns while I went heavy on the crushed Oreos, and seeing how proud she was serving her creations to friends made me realize recipes like this become memories far beyond the last bite.
Topping Combinations That Work
After years of experimenting, I've found some pairings that never miss. Peanut butter chips with pretzels adds salt and crunch. Coconut flakes with white chocolate chips transforms these into something tropical. Caramel bits with sea salt creates this incredible sweet-savory situation that people can't stop talking about.
Making Them Ahead
These cupcakes actually improve after a night in the fridge, when the brownie becomes more fudgy and the cheesecake develops that perfect dense texture. I bake them the day before parties and keep them hidden in the back of the refrigerator until guests arrive, pulling them out about twenty minutes before serving so they're not too cold.
Serving Suggestions
A warm brownie cup straight from the oven feels like a different experience than a chilled one, and both are incredible in their own way. For special occasions, I like to drizzle them with melted chocolate or crown them with a tiny dollop of whipped cream and a fresh raspberry.
- Cold milk cuts through the richness and makes every bite taste like childhood
- Dark roast coffee brings out the chocolate notes while balancing the sweetness
- A scoop of vanilla ice cream melting over a slightly warm cup creates the best temperature contrast
 Save
Save Whether you're making these for a crowd or just treating yourself on a Tuesday night, there's something deeply satisfying about having your very own perfectly portioned brownie cheesecake cup.
Recipe FAQs
- → Can I make these brownie cheesecake cups ahead of time?
-
Absolutely! These cups actually taste better when made ahead. They can be stored in an airtight container in the refrigerator for up to 5 days. The flavors develop and the texture becomes even more fudgy after chilling. Bring to room temperature for about 15 minutes before serving for the best experience.
- → What other toppings can I use for the loaded topping mix?
-
Feel free to customize the toppings based on your preferences. Try peanut butter chips, toffee bits, shredded coconut, crushed pretzels, graham cracker crumbs, or chopped candy bars. You can also use seasonal toppings like peppermint pieces during holidays or fresh berries for a lighter twist.
- → How do I know when the brownie cheesecake cups are done baking?
-
The cups are ready when the cheesecake filling is set and no longer jiggly in the center, and the edges of the brownie base feel firm to the touch. The cheesecake should not brown significantly. A toothpick inserted into the brownie portion should come out with moist crumbs but not wet batter.
- → Can I freeze these loaded brownie cheesecake cups?
-
Yes, these freeze beautifully! Place cooled cups in a single layer on a baking sheet and freeze until solid, then transfer to a freezer-safe container or bag. They'll keep for up to 3 months. Thaw overnight in the refrigerator before serving. Note that some crunchy toppings like nuts may soften slightly after freezing.
- → Why did my cheesecake filling crack on top?
-
Cracking usually occurs from overbaking or rapid temperature changes. Make sure not to overmix the cheesecake filling—mix just until combined. Also, let the cups cool gradually in the pan before transferring to a wire rack. If cracks appear, don't worry—the loaded toppings will cover them perfectly!
- → Can I make these gluten-free?
-
Yes, simply substitute the all-purpose flour with a reliable 1:1 gluten-free flour blend. Ensure your other ingredients, particularly the crushed Oreos and any other toppings, are certified gluten-free. The texture remains just as delicious with this substitution.
