 Save
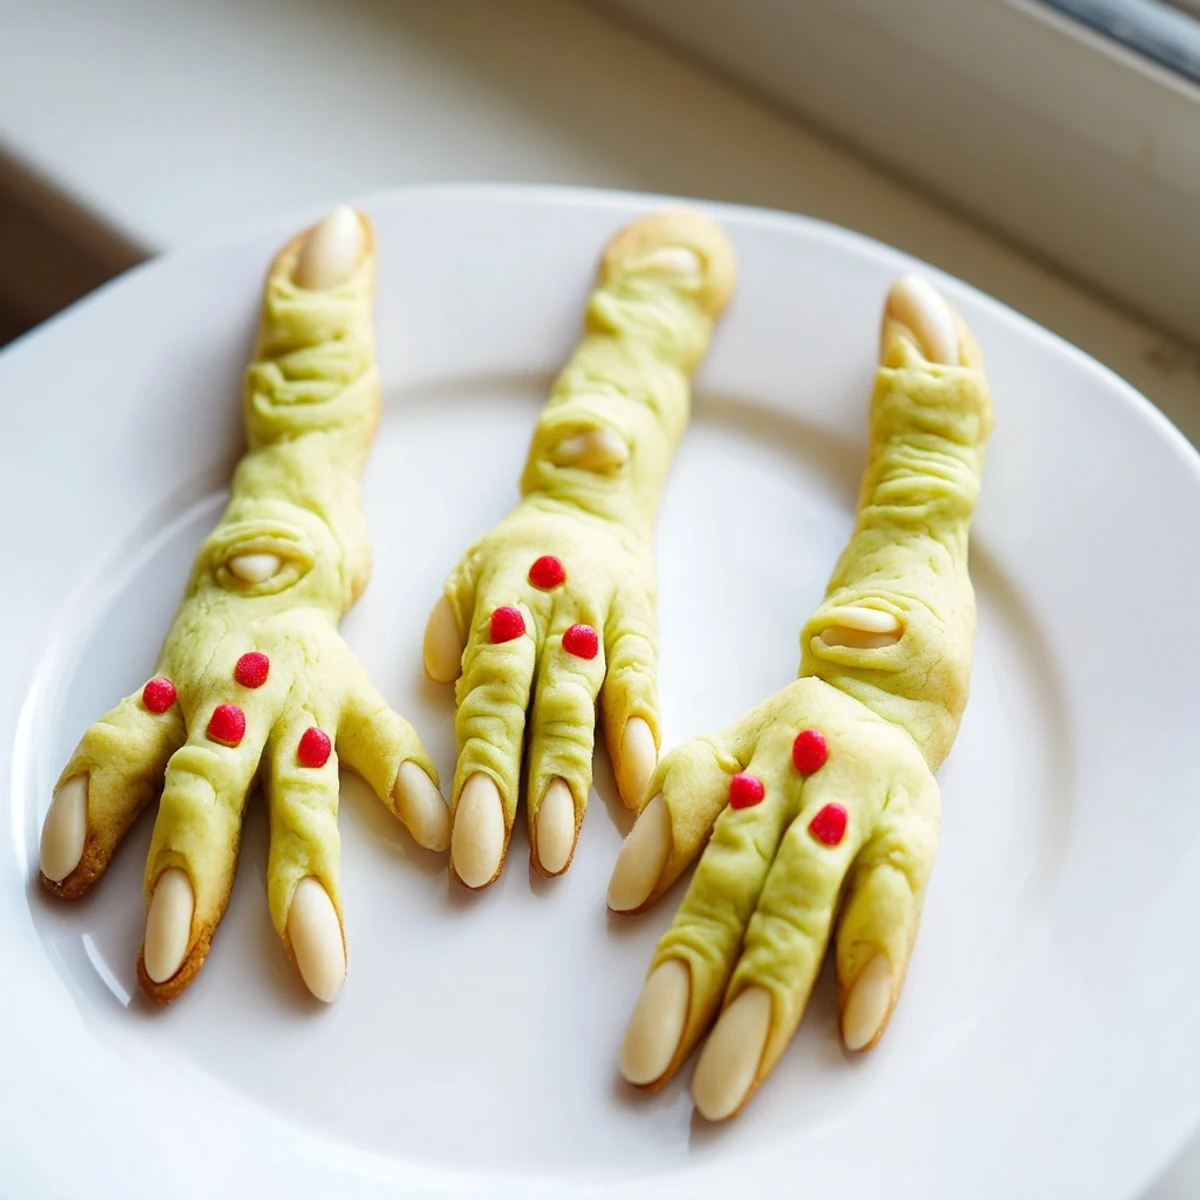
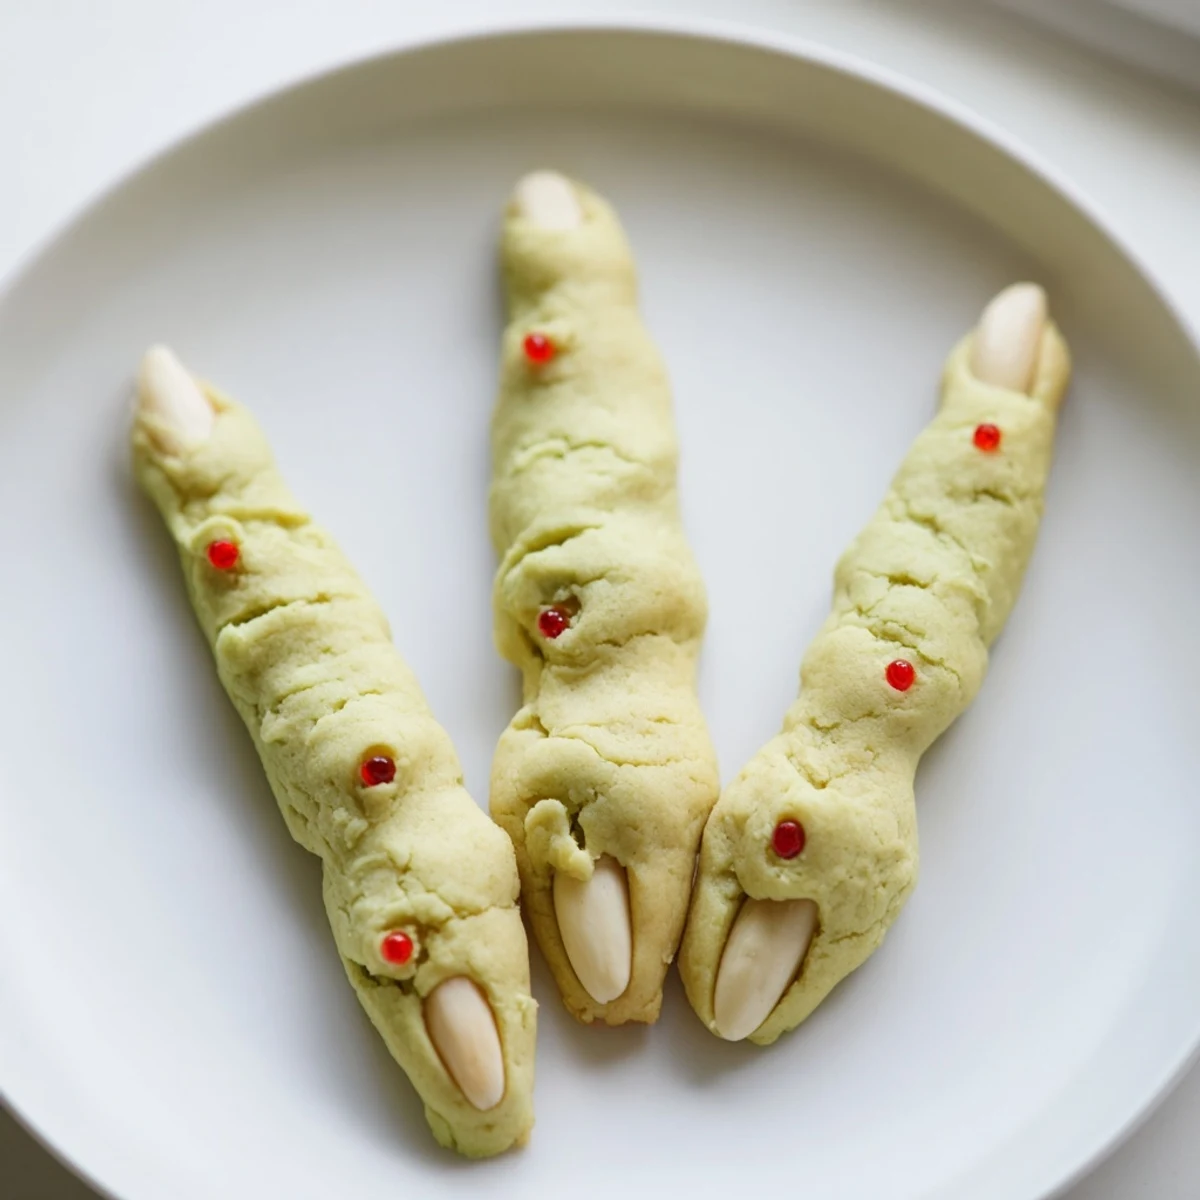
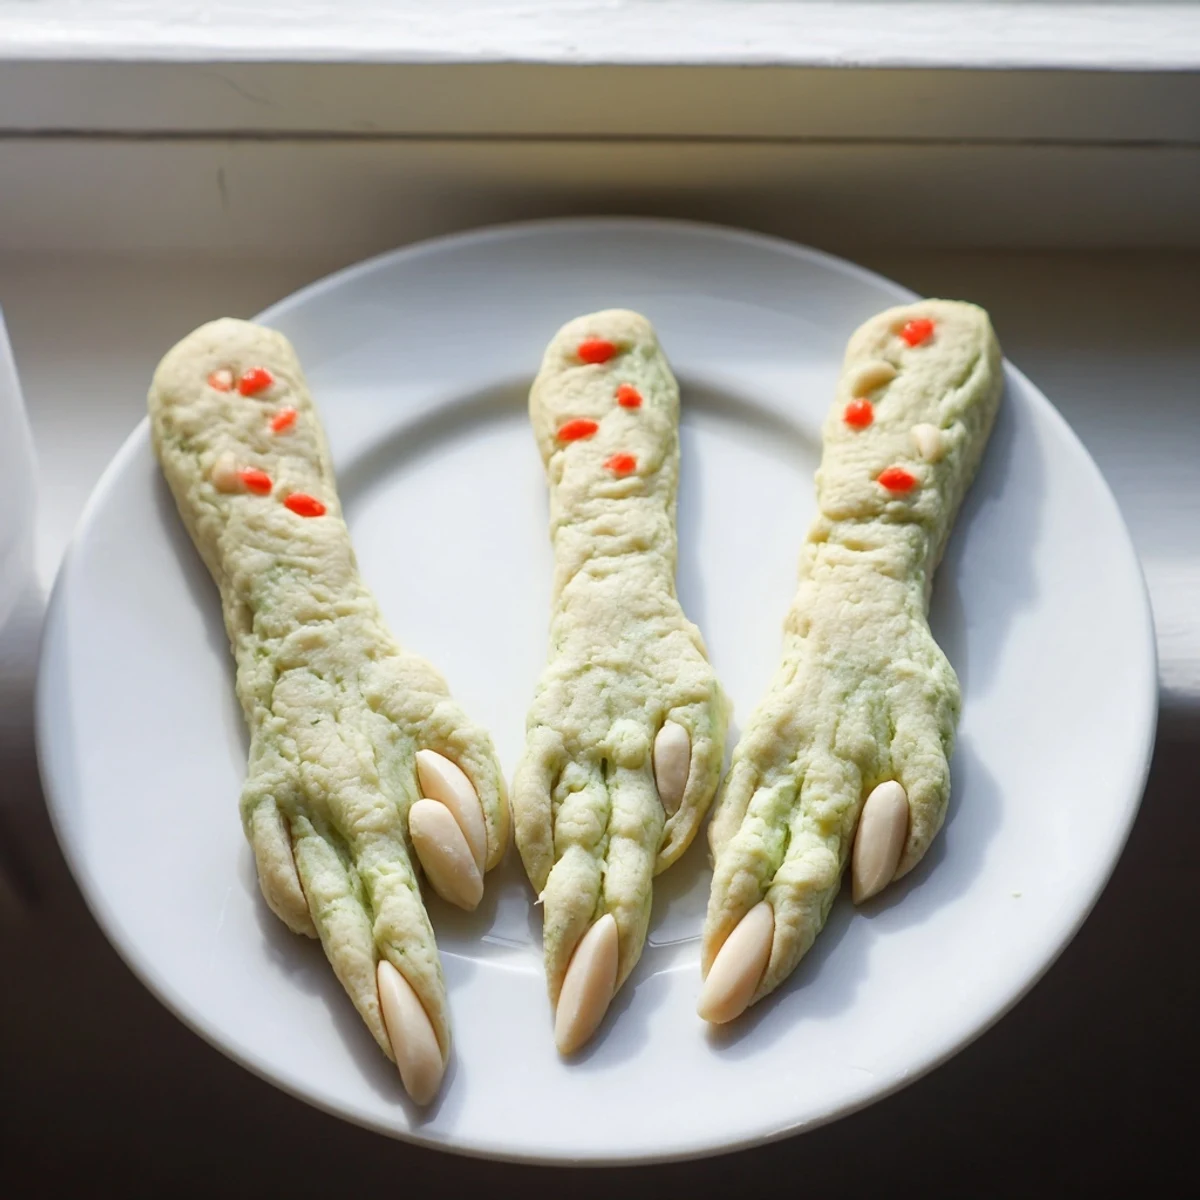
Save These witch finger cookies combine buttery almond-flavored dough shaped into creepy fingers with blanched almond fingernails. After baking, a touch of red food coloring or strawberry jam creates a gory effect that's perfect for Halloween celebrations. The dough comes together quickly and can be tinted green or gray for extra spookiness.
Each batch yields 24 cookies that work wonderfully alongside hot cider or festive cocktails. The almond extract gives them a sophisticated flavor while the playful appearance makes them a hit at both children's and adult gatherings.
The year my daughter turned eight, she begged for a haunted house birthday party. I spent three weeks transforming our garage into a spooky dungeon, but these witch finger cookies were the real showstopper. When her little cousin reached for one and then shrieked, I knew we had nailed it. Now they are the first thing everyone asks about when October rolls around.
Last year I made sixty of these for our office potluck and watched grown men hesitate before picking one up. The second someone took that first bite and realized how buttery and tender they were, the plate was empty within minutes. My coworker texted me that evening for the recipe, saying her kids could not stop talking about the witch fingers.
Ingredients
- Unsalted butter: Room temperature butter creates that tender melt in your mouth texture that makes these cookies irresistible
- Granulated sugar: Creaming this properly with the butter is what gives the cookies their perfect structure
- Large egg: Bind everything together while adding richness to the dough
- Vanilla extract: Pure extract makes all the difference here for deep flavor
- Almond extract: This is the secret ingredient that gives these cookies their distinctive grown up taste
- All purpose flour: The structure builder that holds those creepy finger shapes perfectly
- Baking powder: Just enough lift to keep fingers from being too dense
- Salt: Balances the sweetness and wakes up all the flavors
- Whole blanched almonds: These become the perfectly creepy fingernails that sell the illusion
- Red gel food coloring: The bloody detail that makes people do a double take
Instructions
- Get your oven ready:
- Preheat to 325°F and line two baking sheets with parchment paper so nothing sticks
- Cream the butter and sugar:
- Beat them together until the mixture looks pale and fluffy, which takes about three minutes of patience
- Add the wet ingredients:
- Beat in the egg, vanilla, and almond extract until everything is fully combined
- Whisk the dry ingredients:
- In a separate bowl, combine flour, baking powder, and salt so they are evenly distributed
- Make the dough:
- Gradually mix the dry ingredients into the wet ones, stopping as soon as a dough forms
- Shape the fingers:
- Roll tablespoon portions of dough into 3 to 4 inch logs, then use a knife to create knuckle lines and press an almond into one end for a fingernail
- Bake to perfection:
- Place on prepared sheets about 2 inches apart and bake for 18 to 20 minutes until lightly golden
- Add the bloody details:
- Carefully remove the almonds, apply red coloring or jam to the nail bed, press the almonds back in, and let cool completely
 Save
Save My neighbor came over last Halloween just as I was pulling a batch from the oven. She stood in my kitchen laughing for five straight minutes, then asked if she could take a photo to show her husband. The next day she called to say her teenage son had already requested them for his party next year.
Making Them Extra Creepy
I have learned that the little details matter most. Tinting small portions of dough with green or gray food coloring creates gnarly witch fingers that look even more realistic. Sometimes I make a batch with multiple skin tones for extra variety on the platter.
The Bloody Secret
Strawberry or raspberry jam works even better than food coloring for that fresh blood effect. It creates a slightly sticky authentic looking mess that really sells the illusion. Plus it adds a sweet fruity contrast to the buttery cookie.
Serving Ideas
These cookies absolutely shine when arranged on a rustic wooden board or dark platter. I like to scatter some plastic spiders around them for atmosphere.
- Pile them into a clear glass jar labeled Witch Parts for maximum effect
- Serve alongside blood red punch or hot mulled cider for a complete Halloween experience
- Package individually in clear bags tied with orange ribbon for party favors that guests actually want to take home
 Save
Save There is something deeply satisfying about serving food that makes people gasp and then immediately reach for seconds. Happy haunting, and may your Halloween be deliciously spooky.
Recipe FAQs
- → How long do witch finger cookies stay fresh?
-
Store in an airtight container at room temperature for up to 5 days. The almond fingernails may soften slightly over time but remain tasty.
- → Can I freeze the dough?
-
Yes, freeze shaped fingers on a baking sheet until firm, then transfer to a freezer bag for up to 3 months. Bake from frozen adding 2-3 minutes.
- → What creates the bloody effect?
-
Red gel food coloring or strawberry/raspberry jam applied to the fingernail bed after baking creates the gruesome bloody detail.
- → Can I make these without almond extract?
-
Replace with lemon extract or vanilla for a different flavor profile. The almond can also be omitted entirely for a classic butter cookie taste.
- → How do I get realistic knuckle details?
-
Gently press the back of a small knife into the dough before baking to create natural-looking creases where knuckles would be.
